Fog
Fog allows you to hide parts of your scene from your players. There are many times when playing tabletop games when this will be useful. For example you can use fog to hide areas of a dungeon that players haven’t visited. You can use fog to reveal a secret room in a house being investigated. You could also use fog to run a hex crawl adventure, revealing each hex as they’re visited.
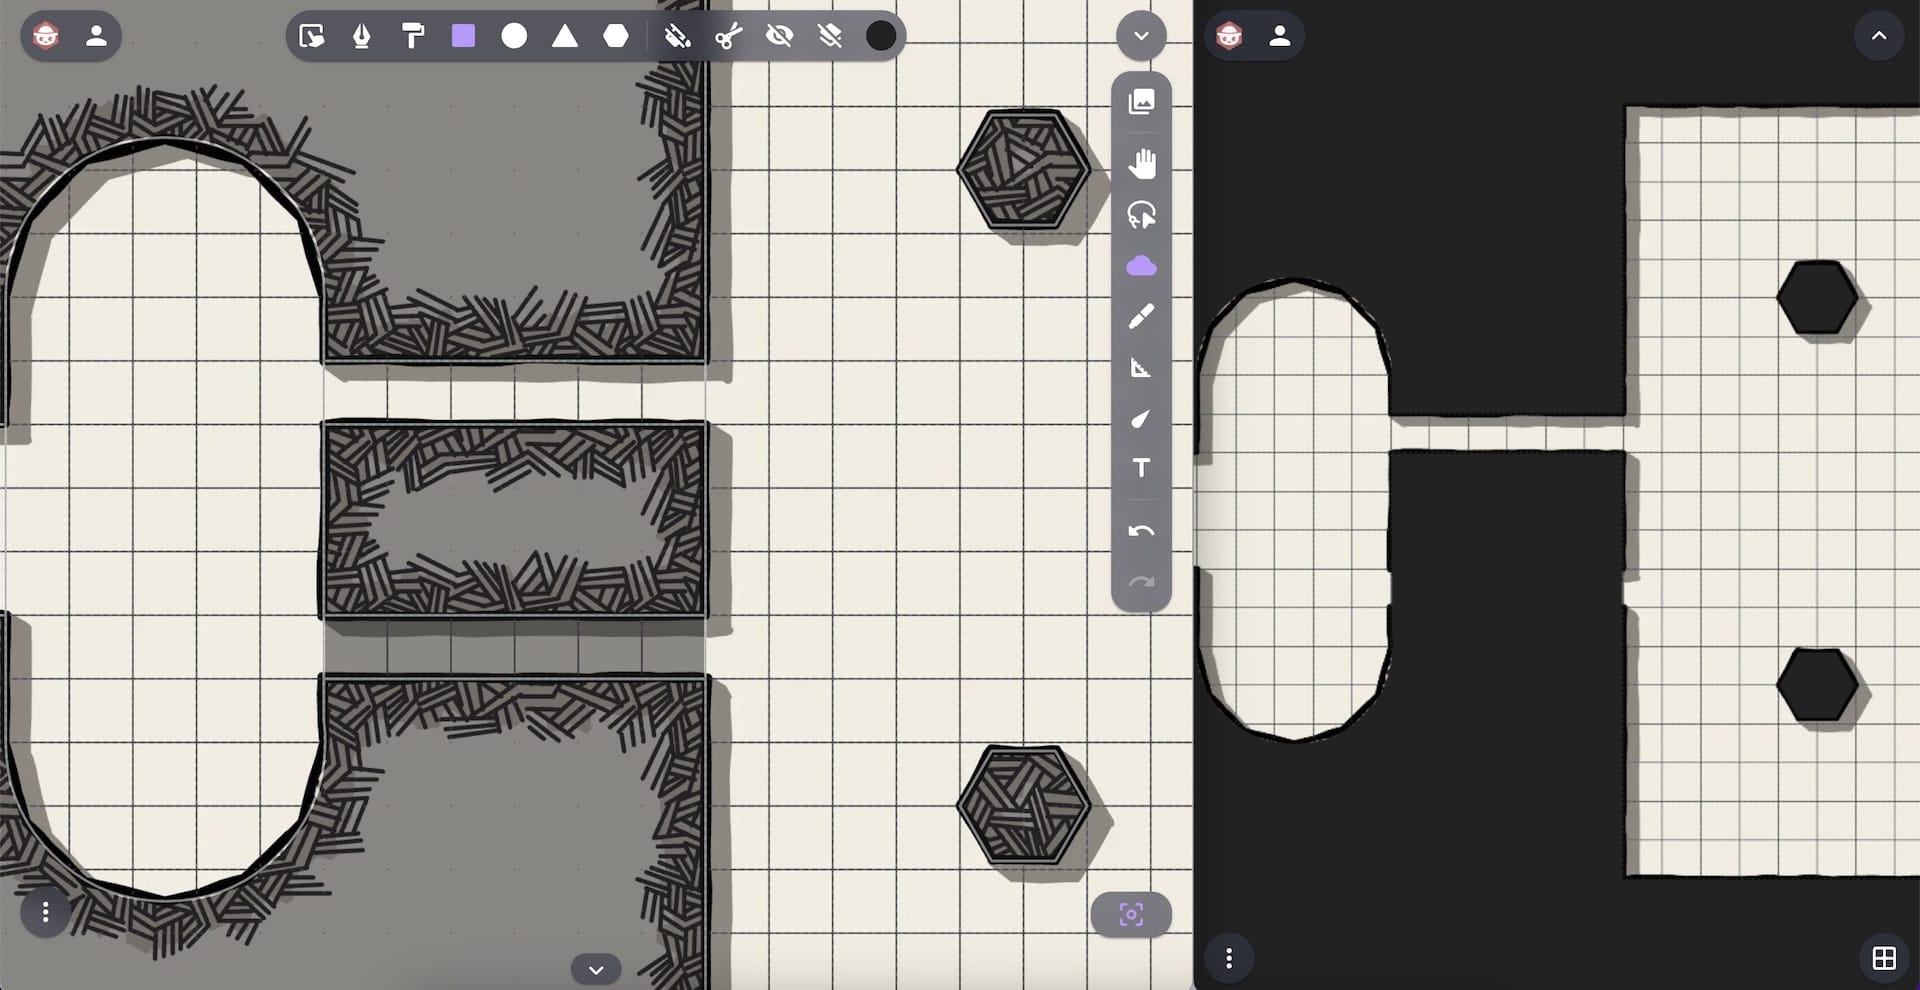
About this Guide
We often find the fog system is easiest to learn with some examples. With this in mind this guide will use four maps created using the drawing tools in Owlbear Rodeo. Each map is designed to showcase a specific feature of the fog system. After these four examples this guide will end with a larger map and some hints on the best way to fog a real-world scenario.
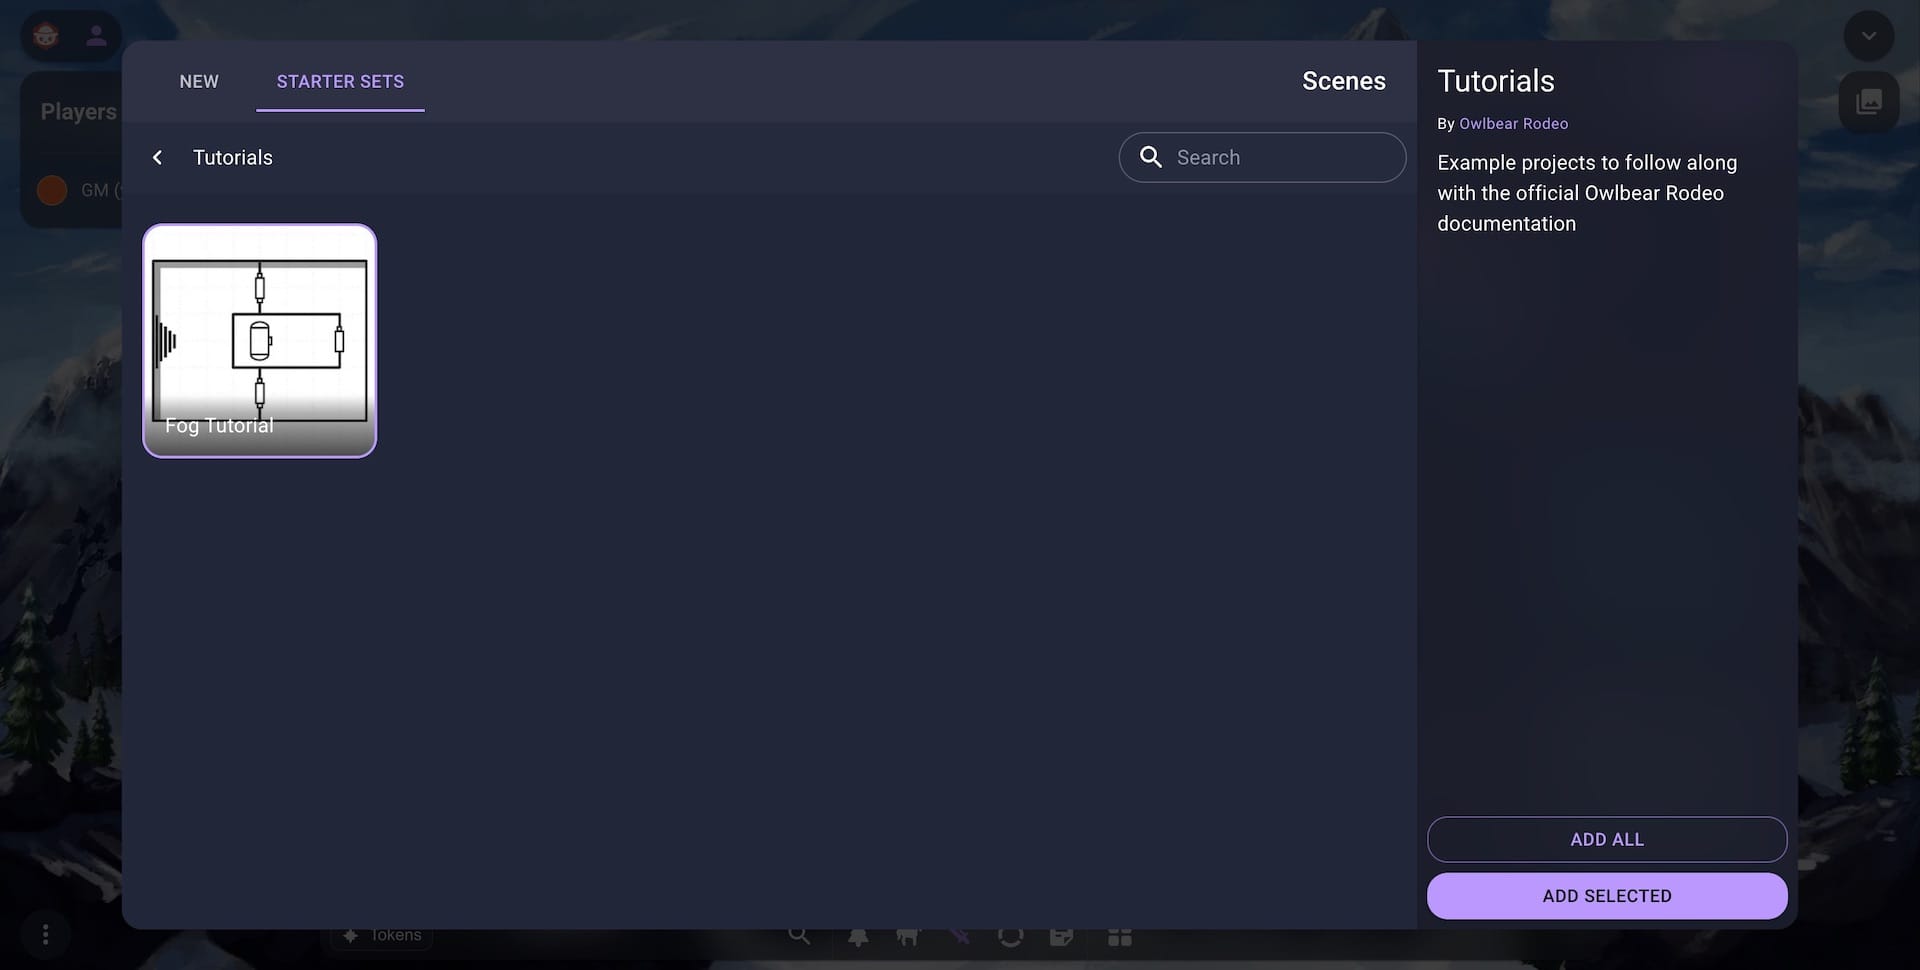
If you would like to follow along with this tutorial we have made the base scene available as a Starter Set. You can access this scene by clicking the Add button in the Asset Manager and selecting the Tutorials Starter Set.
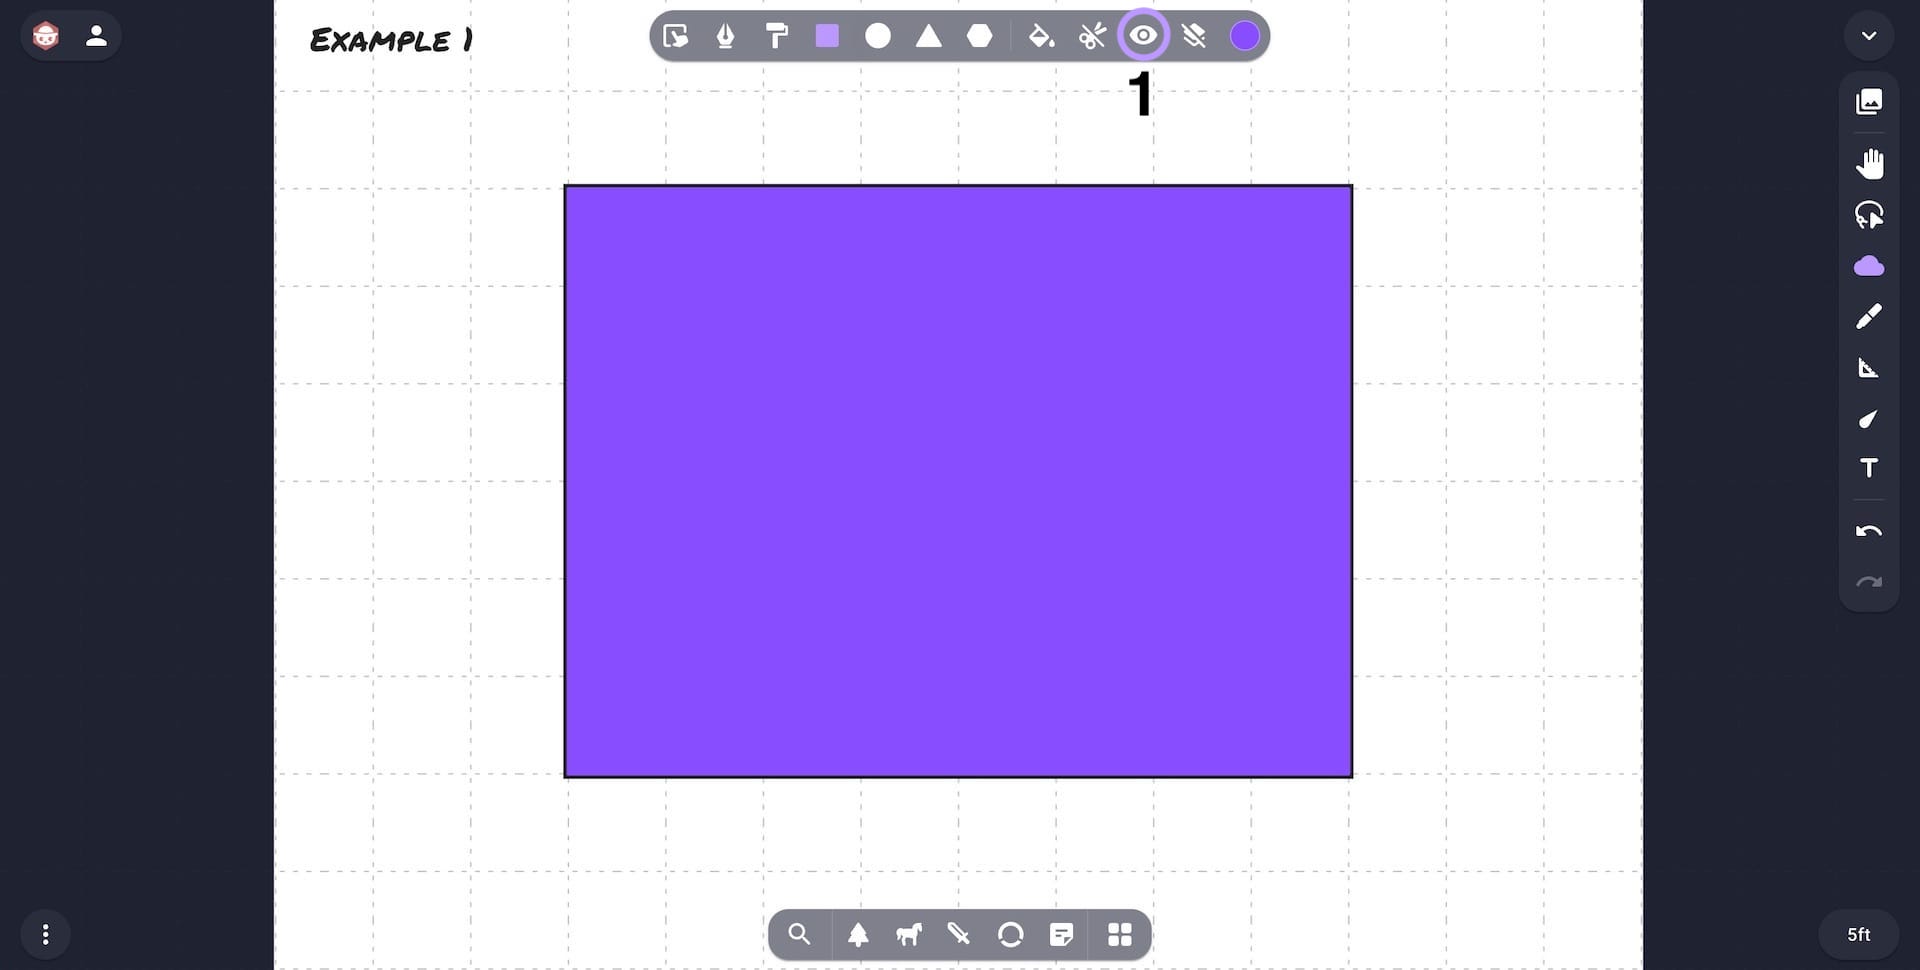
Example 1
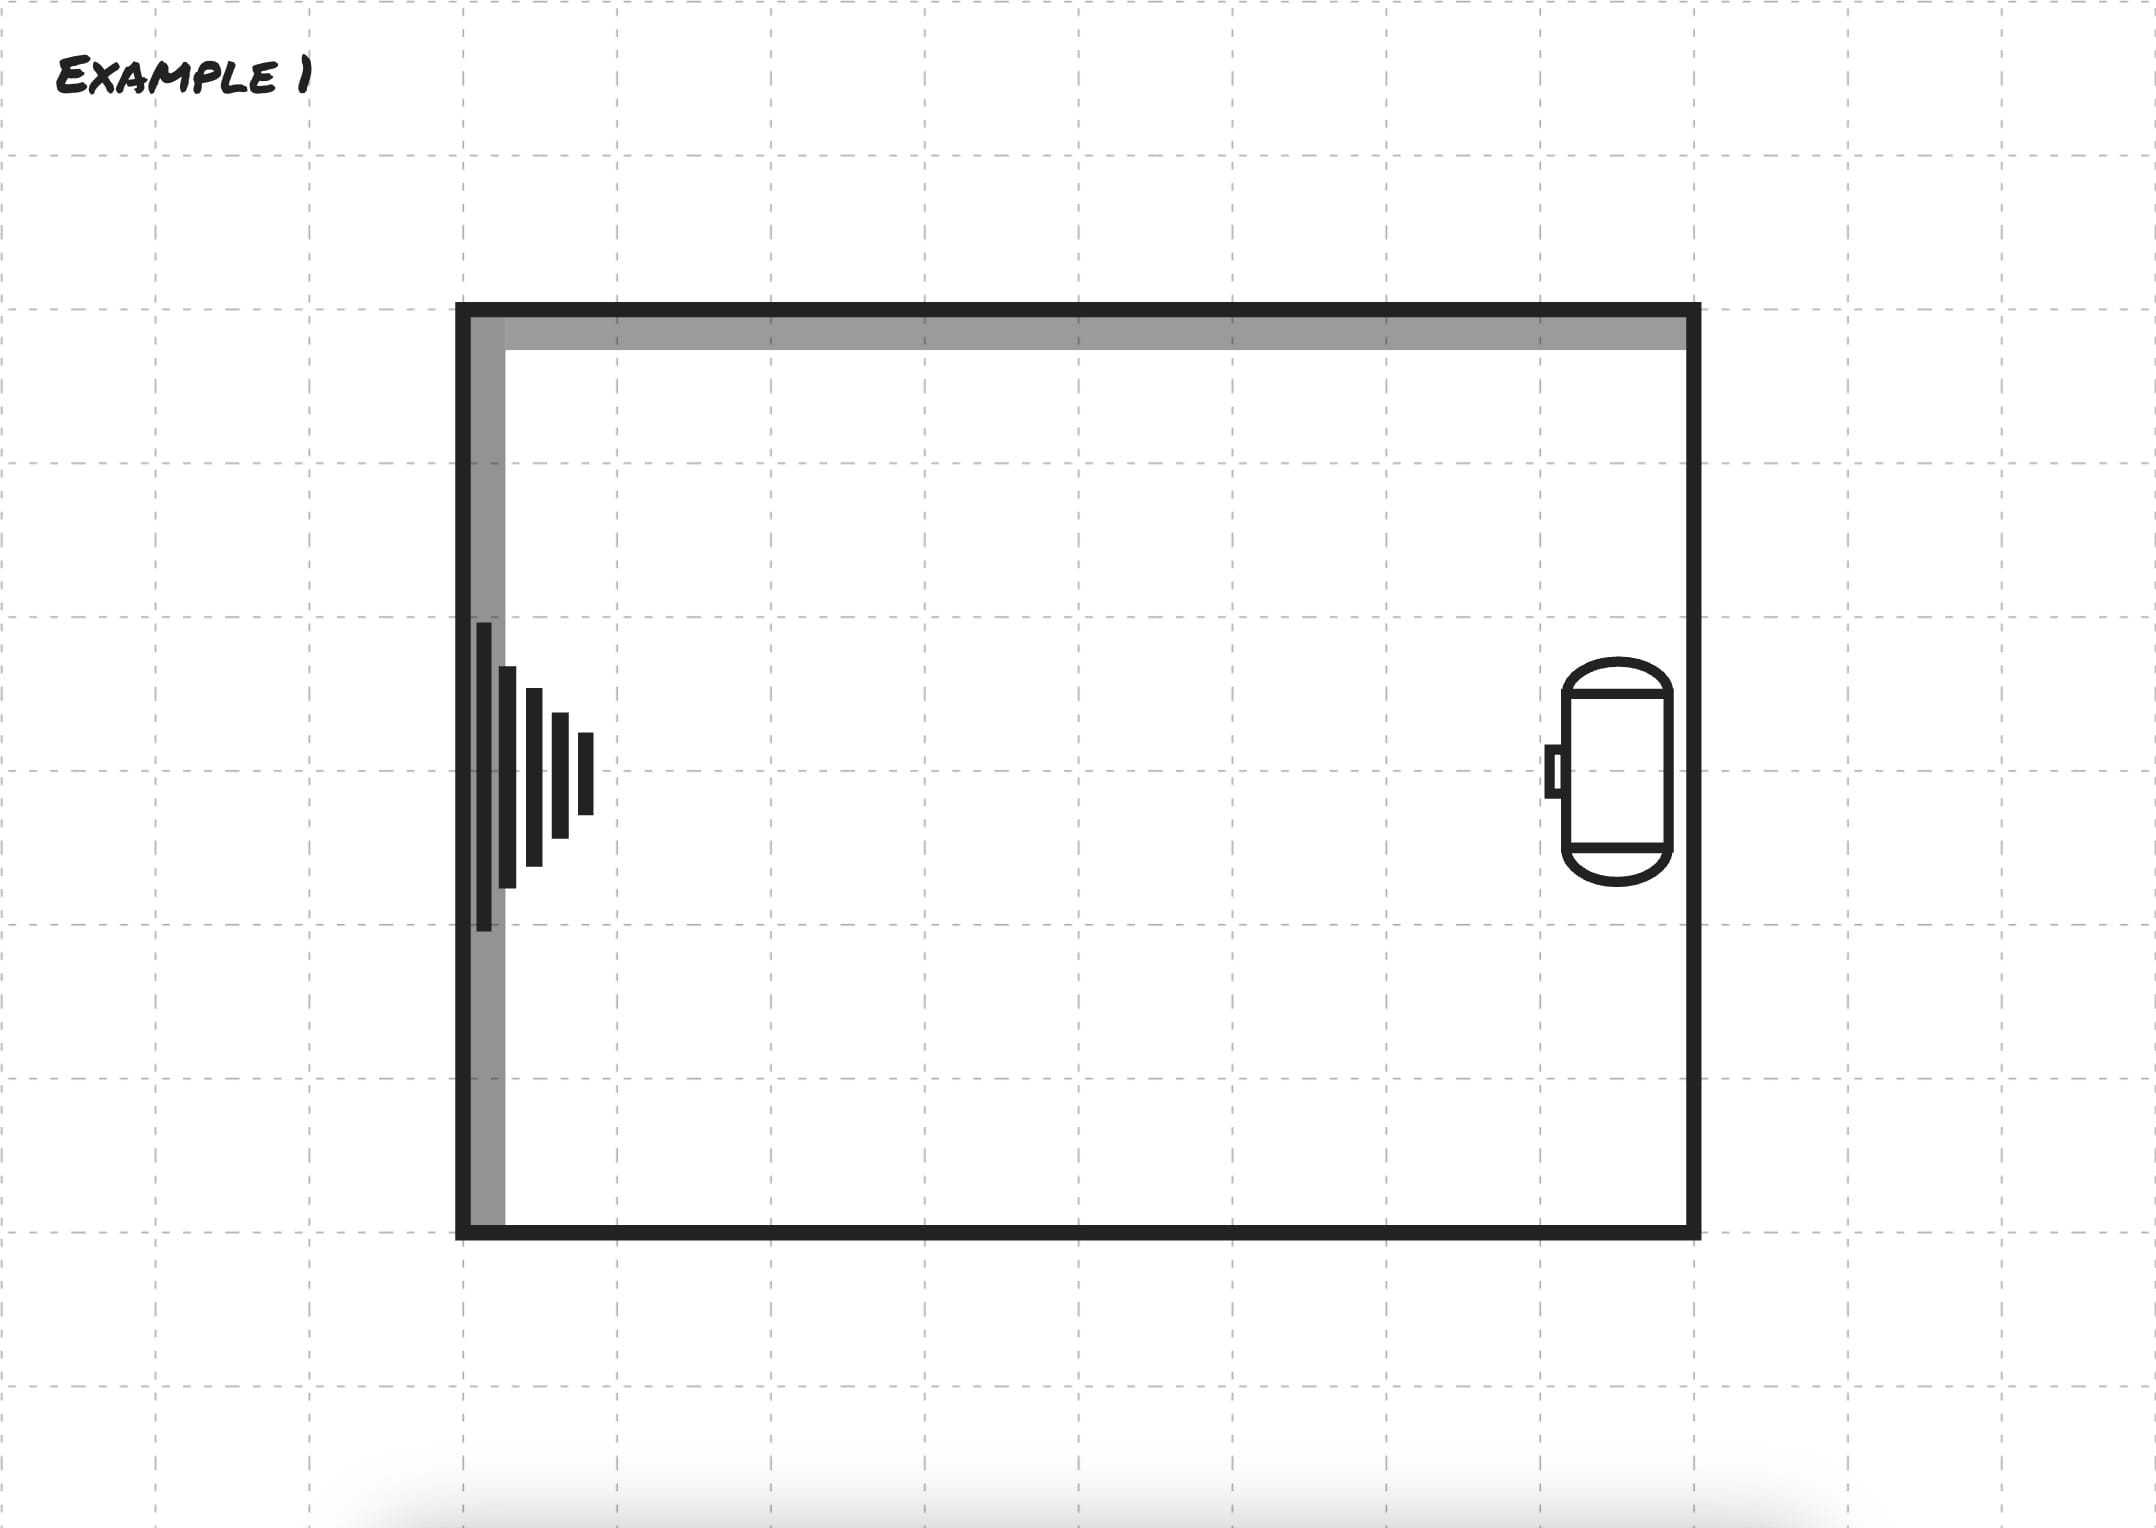
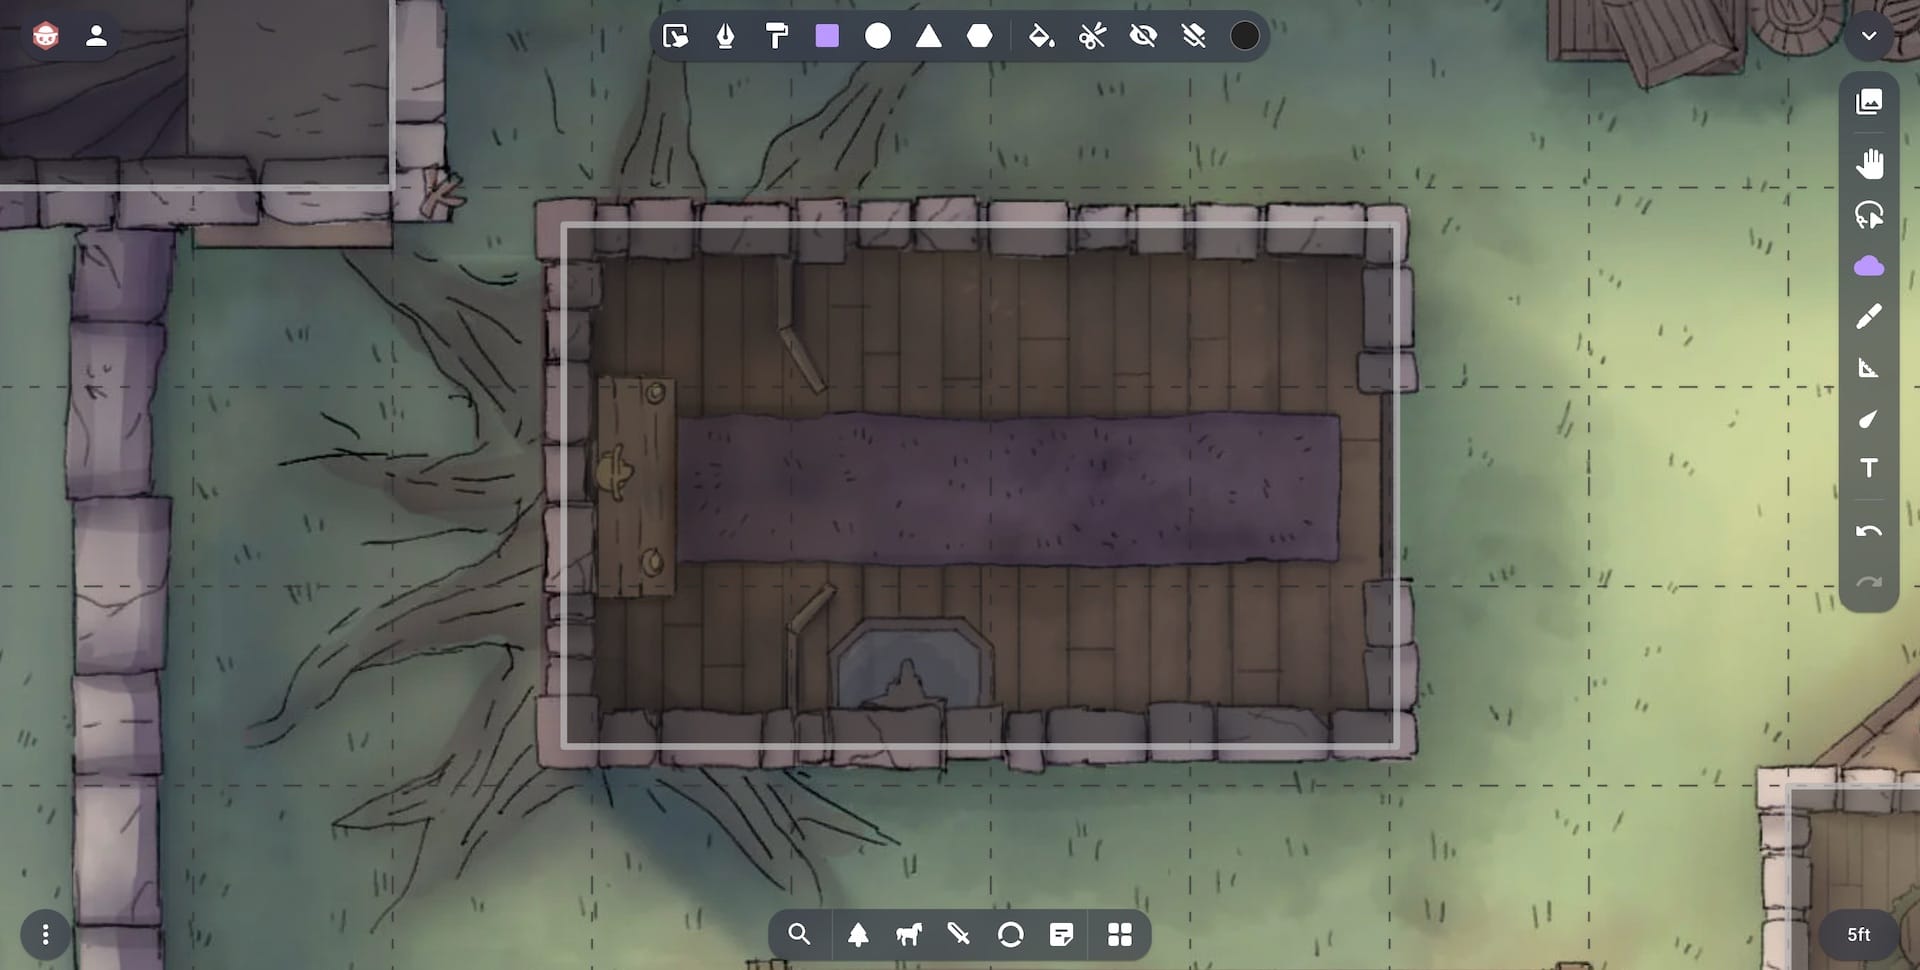
The first example includes a single room with a treasure chest.
To add fog to this scene first click on the Fog tool in the toolbar.

With the fog tool active you will have access to various modes and actions that can interact with the fog tool.

By the end of this tutorial we will have explored each option available but for now you should know that the top bar is split into two categories. On the left are the modes and on the right are the actions. Modes control what the fog tool does while actions change settings or interact with the current fog.
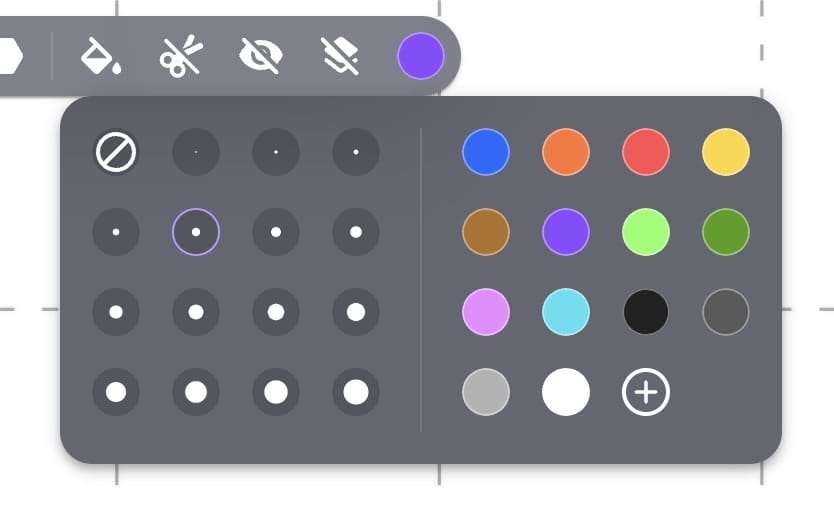
Before we explore adding fog, click on the Fog Style action and change the fog color to purple. This will make the fog easier to see for tutorial purposes.
The first step to using the fog tool is to add fog over every room you want hidden. In this case there is only one rectangular room. To add fog to this room select the Rectangle mode.

Now click and drag from one corner of the room to the other.
The room has now been covered in some purple fog but you can still see the treasure chest underneath. This is because fog will be transparent for a GM. To see how a player will view the map click the Enable Fog Preview button in the top bar.
Click the Fog Preview button again to turn back to the GM view.
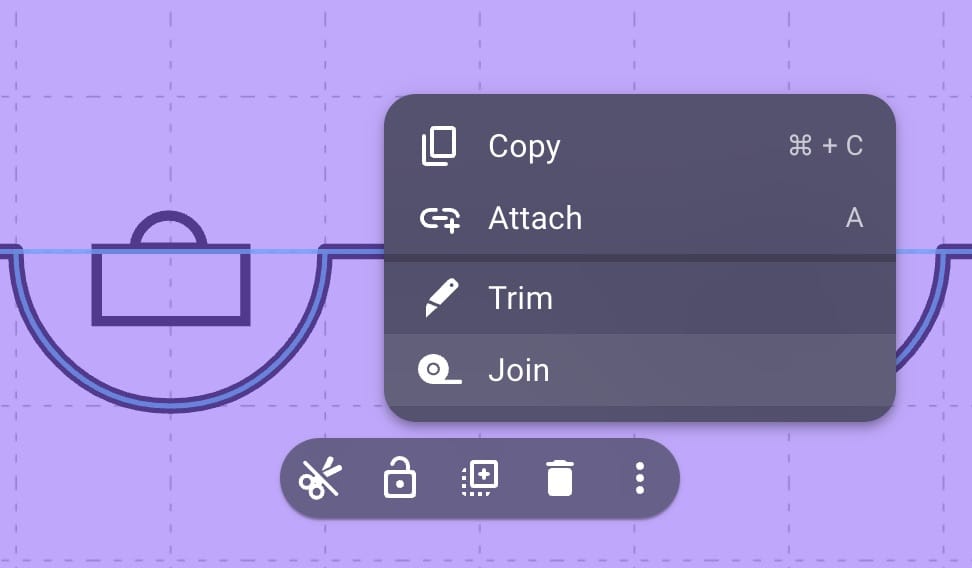
Once your players enter the room you will want to remove the fog so they can see what is inside the room. To do this first select the fog shape by clicking it. This will open a context menu that will allow you to edit this shape.

To be able to toggle this shape on and off use the Cut button.
The Cut button will cause this shape to cut away from any other fog in the scene. This is very important as we’ll see in a moment.
Commonly when using fog you will want to start by hiding everything from your players. To do this in Owlbear Rodeo you could use the Rectangle mode and draw a very large square to cover your map. However, as Owlbear Rodeo has an infinite canvas, eventually a player will be able to see the edge of this rectangle which could give away how big the map is. To accommodate this Owlbear Rodeo has a Fill Fog action. When clicking this the entire viewport will be covered in fog so no matter how far a player scrolls they won’t be able to see the edge of a map.
To demonstrate this click the Fog Fill button in the top bar.

Your viewport will now be entirely covered in fog except for the room in the center. This is because we enabled the Cut option on the fog shape so it cuts away from the infinite fog.
To fill that section of fog again select the fog shape and click the Uncut button. The entire viewport will now be covered in fog. This is generally the state that you will start in when running an encounter with your players. Then when they enter a room you can select the fog shape for that room and Cut it revealing everything below.
To clean things up for the next example click the Fog Fill button again to remove the infinite fog from the scene.

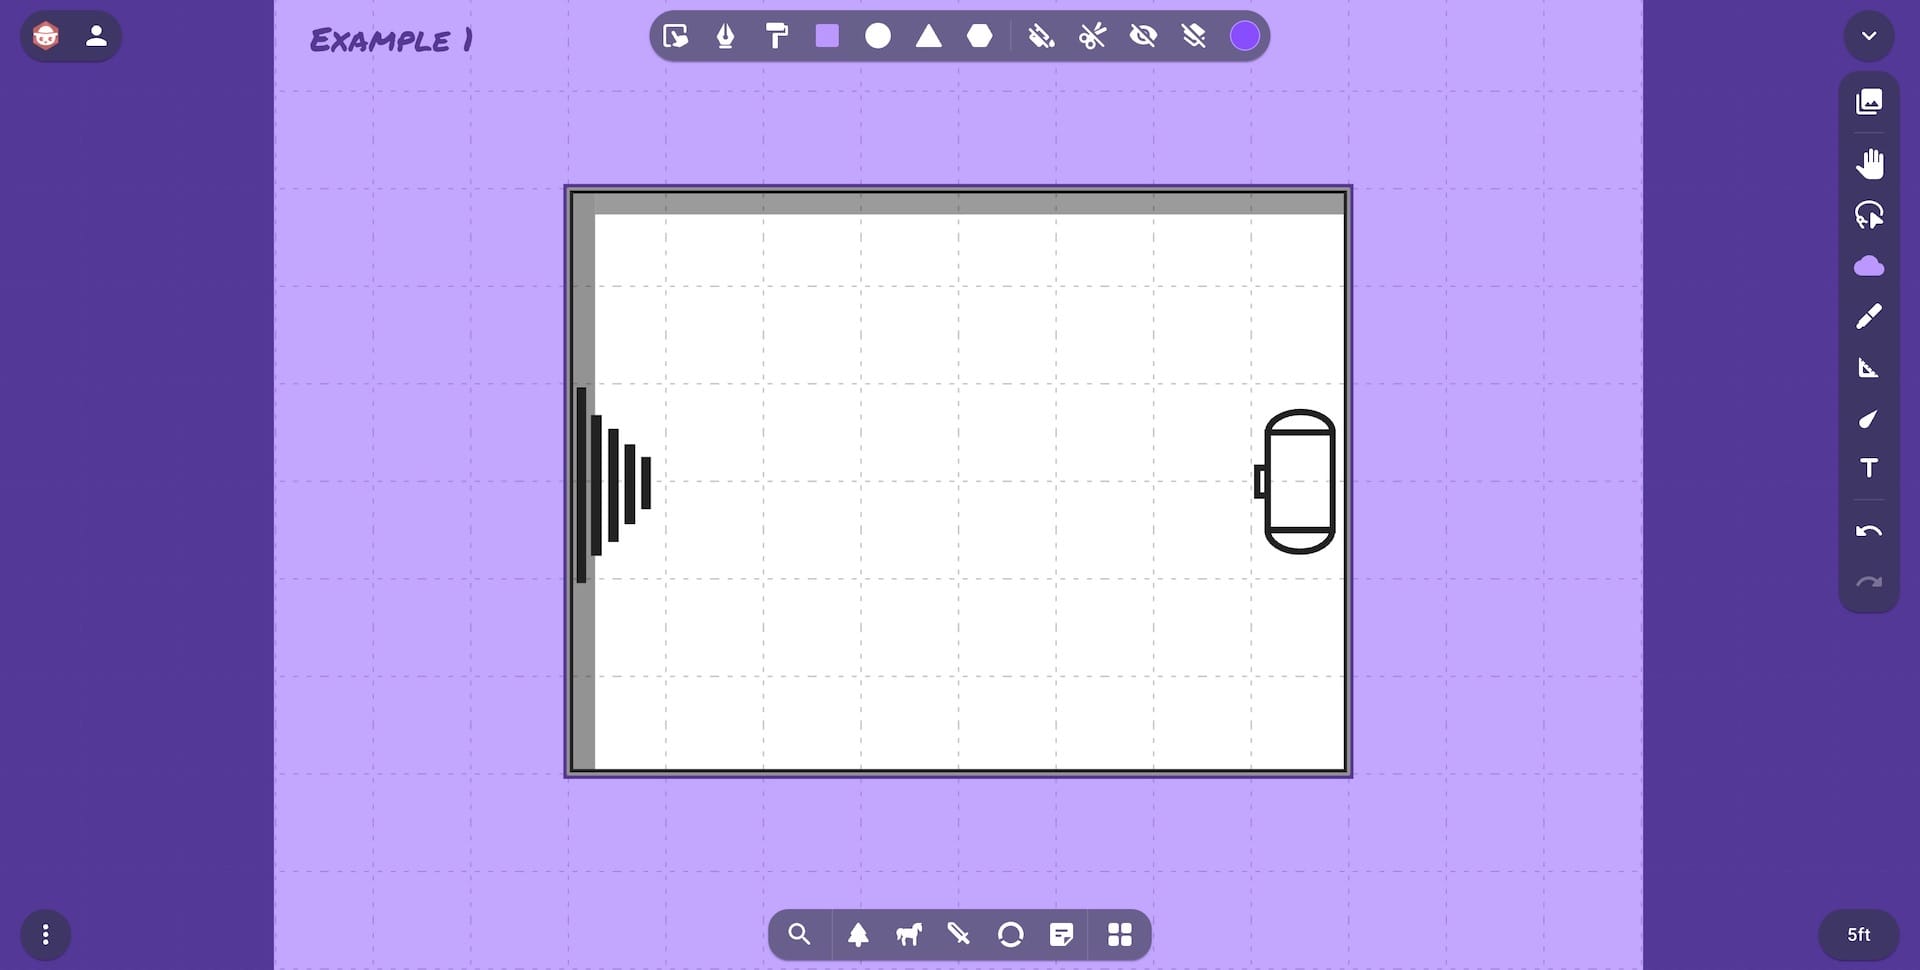
Example 2
In this example we will explore how single layer mode makes adding fog to multi-room dungeons easier.
This example includes three rooms with an entrance on the left, a second room on the right and some treasure in the middle.
The left room is a “C” shape so this will be perfect for the Polygon mode.

With the polygon mode active click on the corners of the first room to add a new shape. Finally click the Finish label or press the Enter key to complete the shape.
The next room we’ll fog is the treasure room.
To do this change back to the Rectangle mode and drag from corner to corner.
The last room is a backwards “C” shape. To fog this you could use the polygon tool like the first room but this will take longer than needed. Instead simply stay with the Rectangle mode and drag over the remainder of the room.
Even though we are in the Rectangle mode, Owlbear Rodeo knows that we don’t usually want to create overlapping fog shapes so it will calculate the exact shape needed to prevent this from happening. This makes it quite a lot faster to create fog shapes for adjacent rooms. This feature is called single layer fog and we will explore it a bit more later.
Now that all the rooms are fogged you can enable Fog Fill and run this room as an encounter. Below is a demo of this with two browser windows side by side to demonstrate a GM view and a player view at the same time.
To clean things up for the next example remove the Fog Fill again.
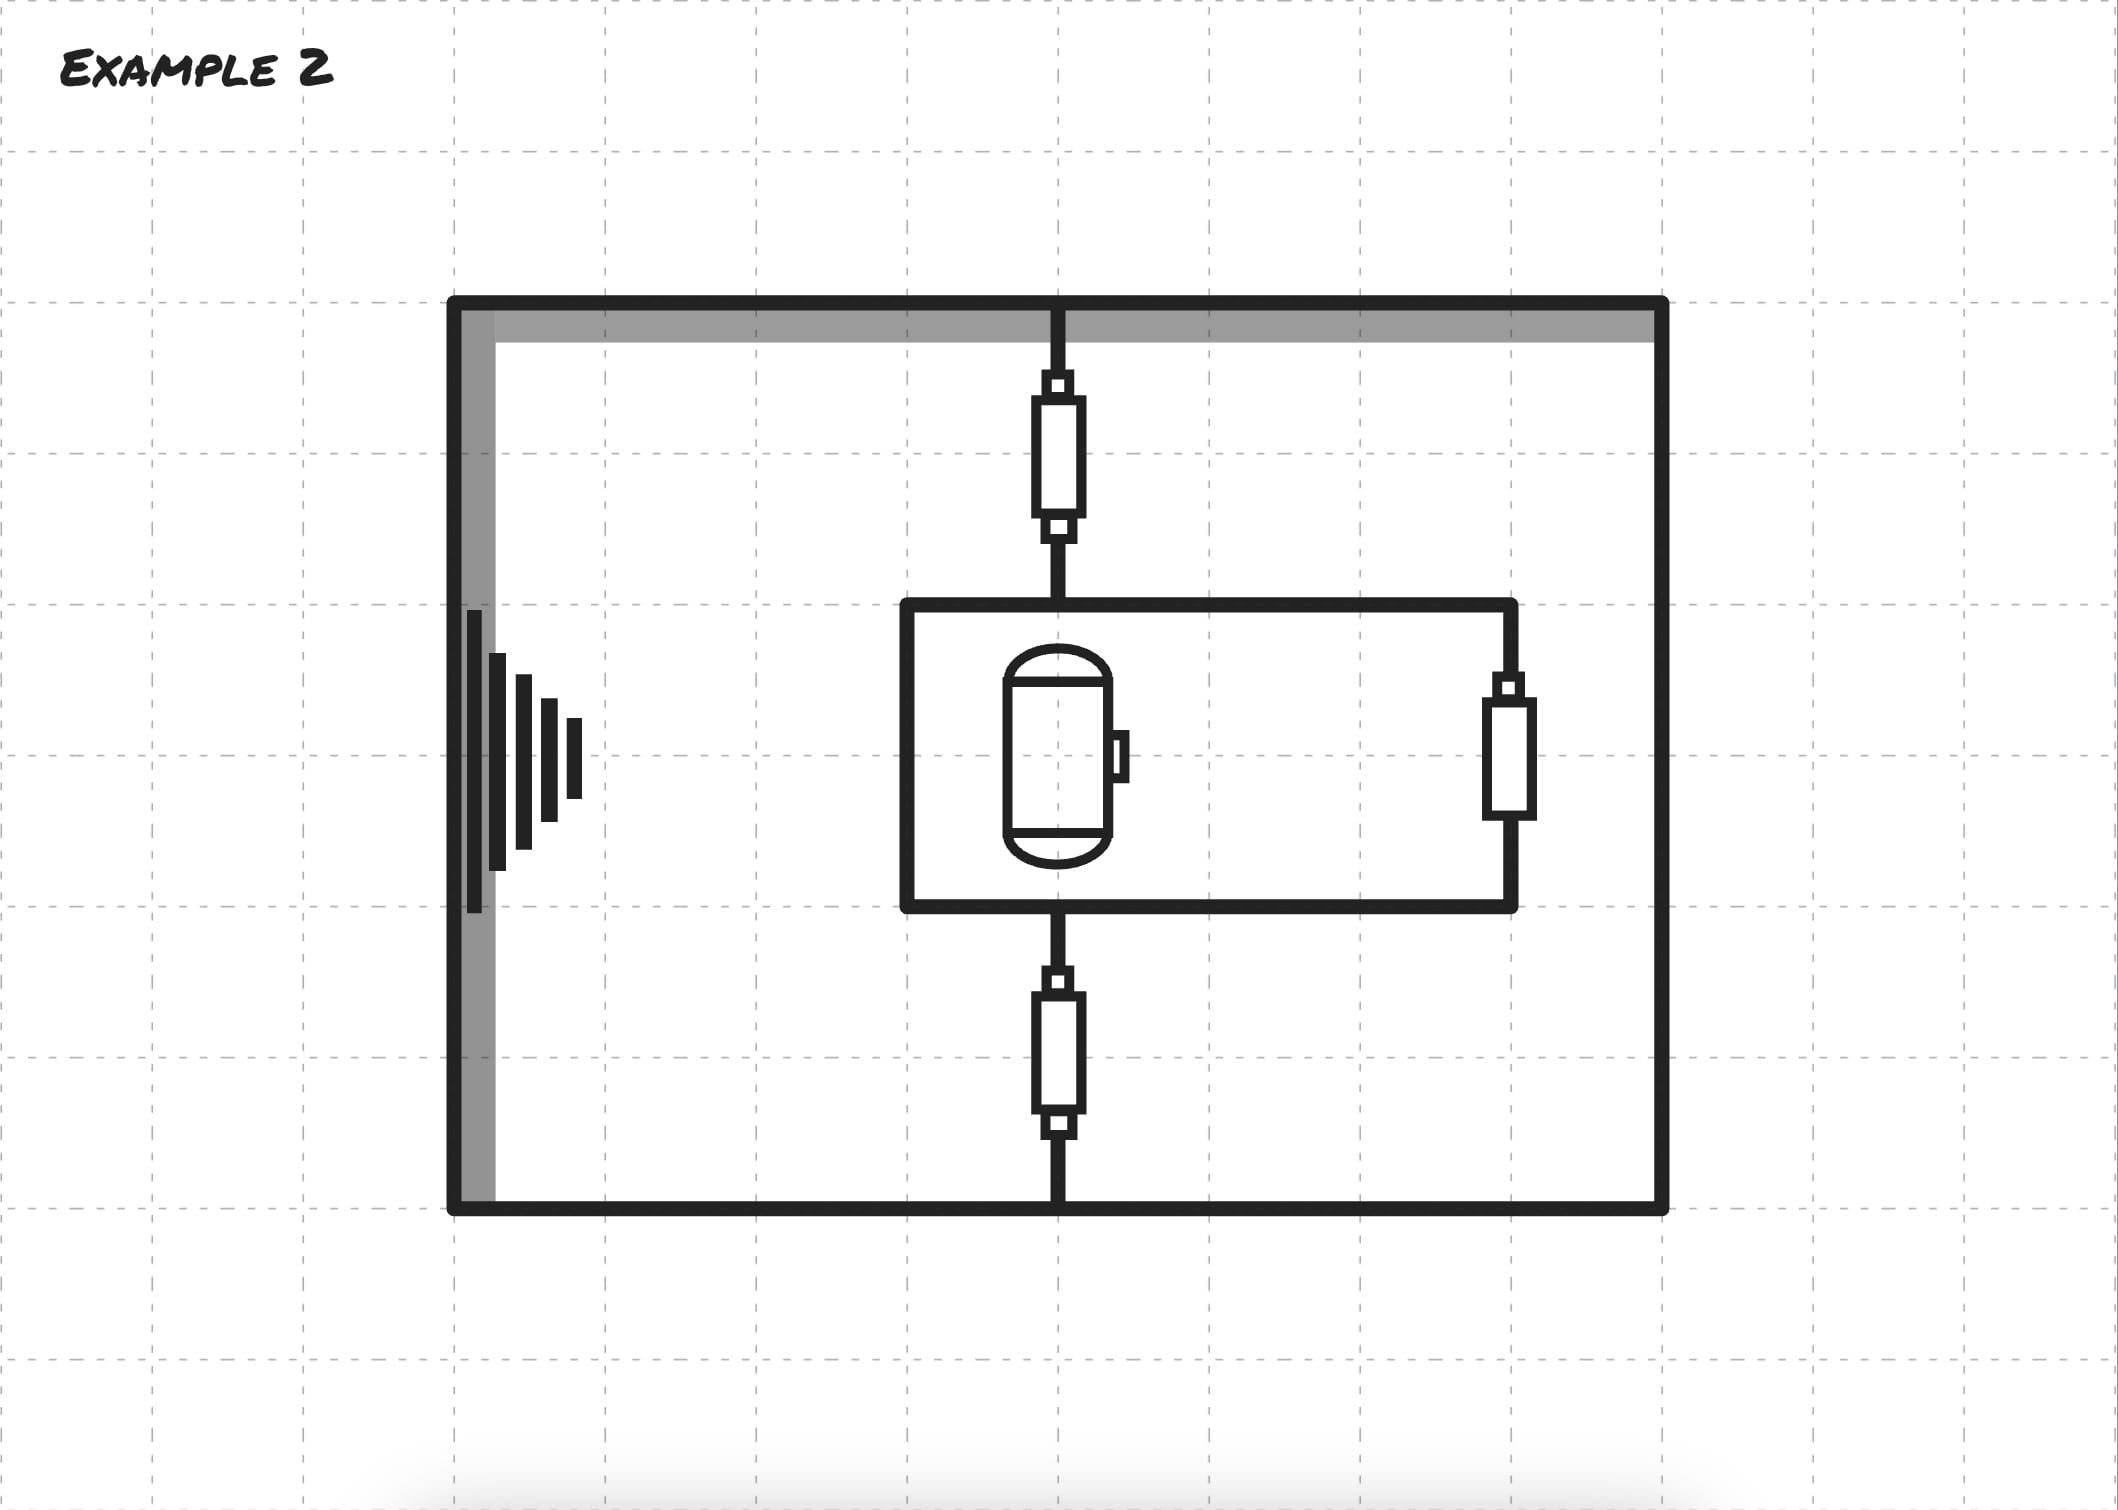
Example 3
In the previous example we made use of both the rectangle and polygon modes. These worked great because our rooms only had flat sides but often real-world maps will include curves and circles. In this example we will explore how to combine shapes to make perfect circular fog.
This example includes a single room but on the top and bottom there are two extensions where a statue might sit.
To start, add a rectangle over the large open area.
To create the semicircles first activate the Circle fog mode then draw a circle over the top left extrusion.
Because of the single-layer feature of Owlbear Rodeo the circle will automatically be cut in half to create the semicircle we need.
We could continue this process drawing a new circle over each statue instead we make this a little quicker using the Grab mode.

As we know each semicircle should be the same shape and size you can quickly duplicate the first shape by pressing the Alt or Option key while dragging.
If you’re using a touchscreen device the same thing can be accomplished by selecting the shape and clicking the Duplicate button.
To create the bottom extensions select both shapes by clicking on each while holding the Shift key. Now use the same Alt drag gesture as before and once both shapes are in position use the rotation handle to rotate them 180 degrees.
When running this encounter you will want to cut out this room as your players enter it. If you select the main chamber and click the Cut button you will notice that none of the outcroppings are cut.
To fix this you could use the Grab mode to select each shape using the Shift key and cut them all at once but this could become tedious. Instead with all the fog shapes selected use the three dots button to find all the options and select the Join option.
This will join all the shapes together so when you cut them out it will happen at once.
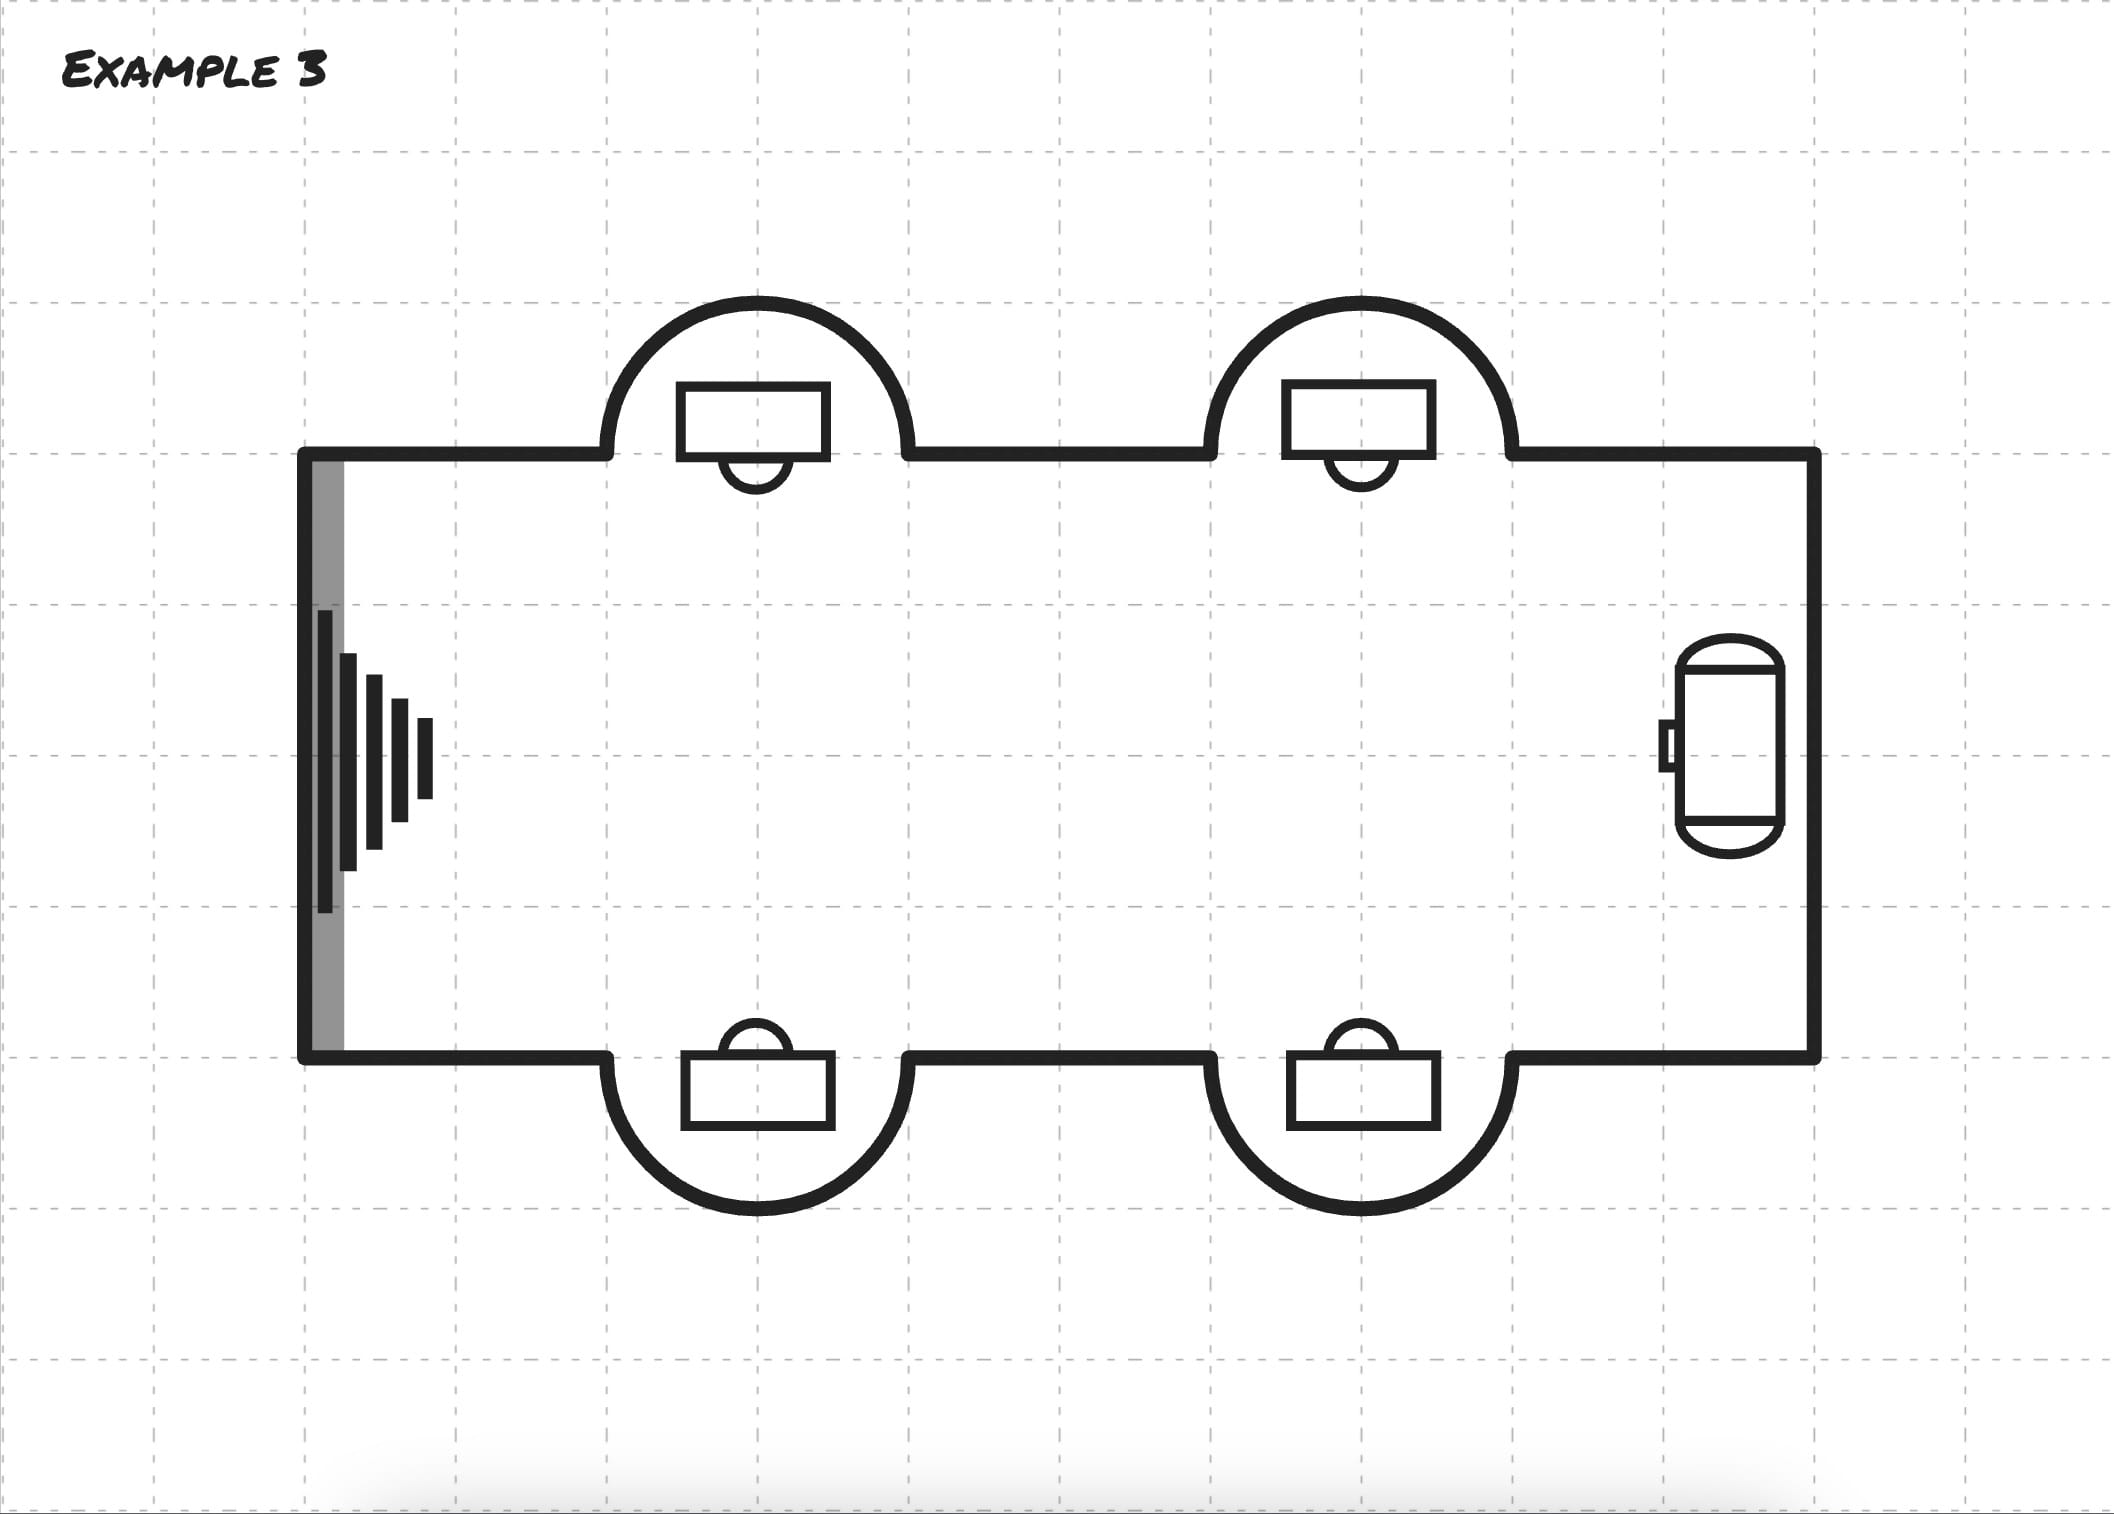
Example 4
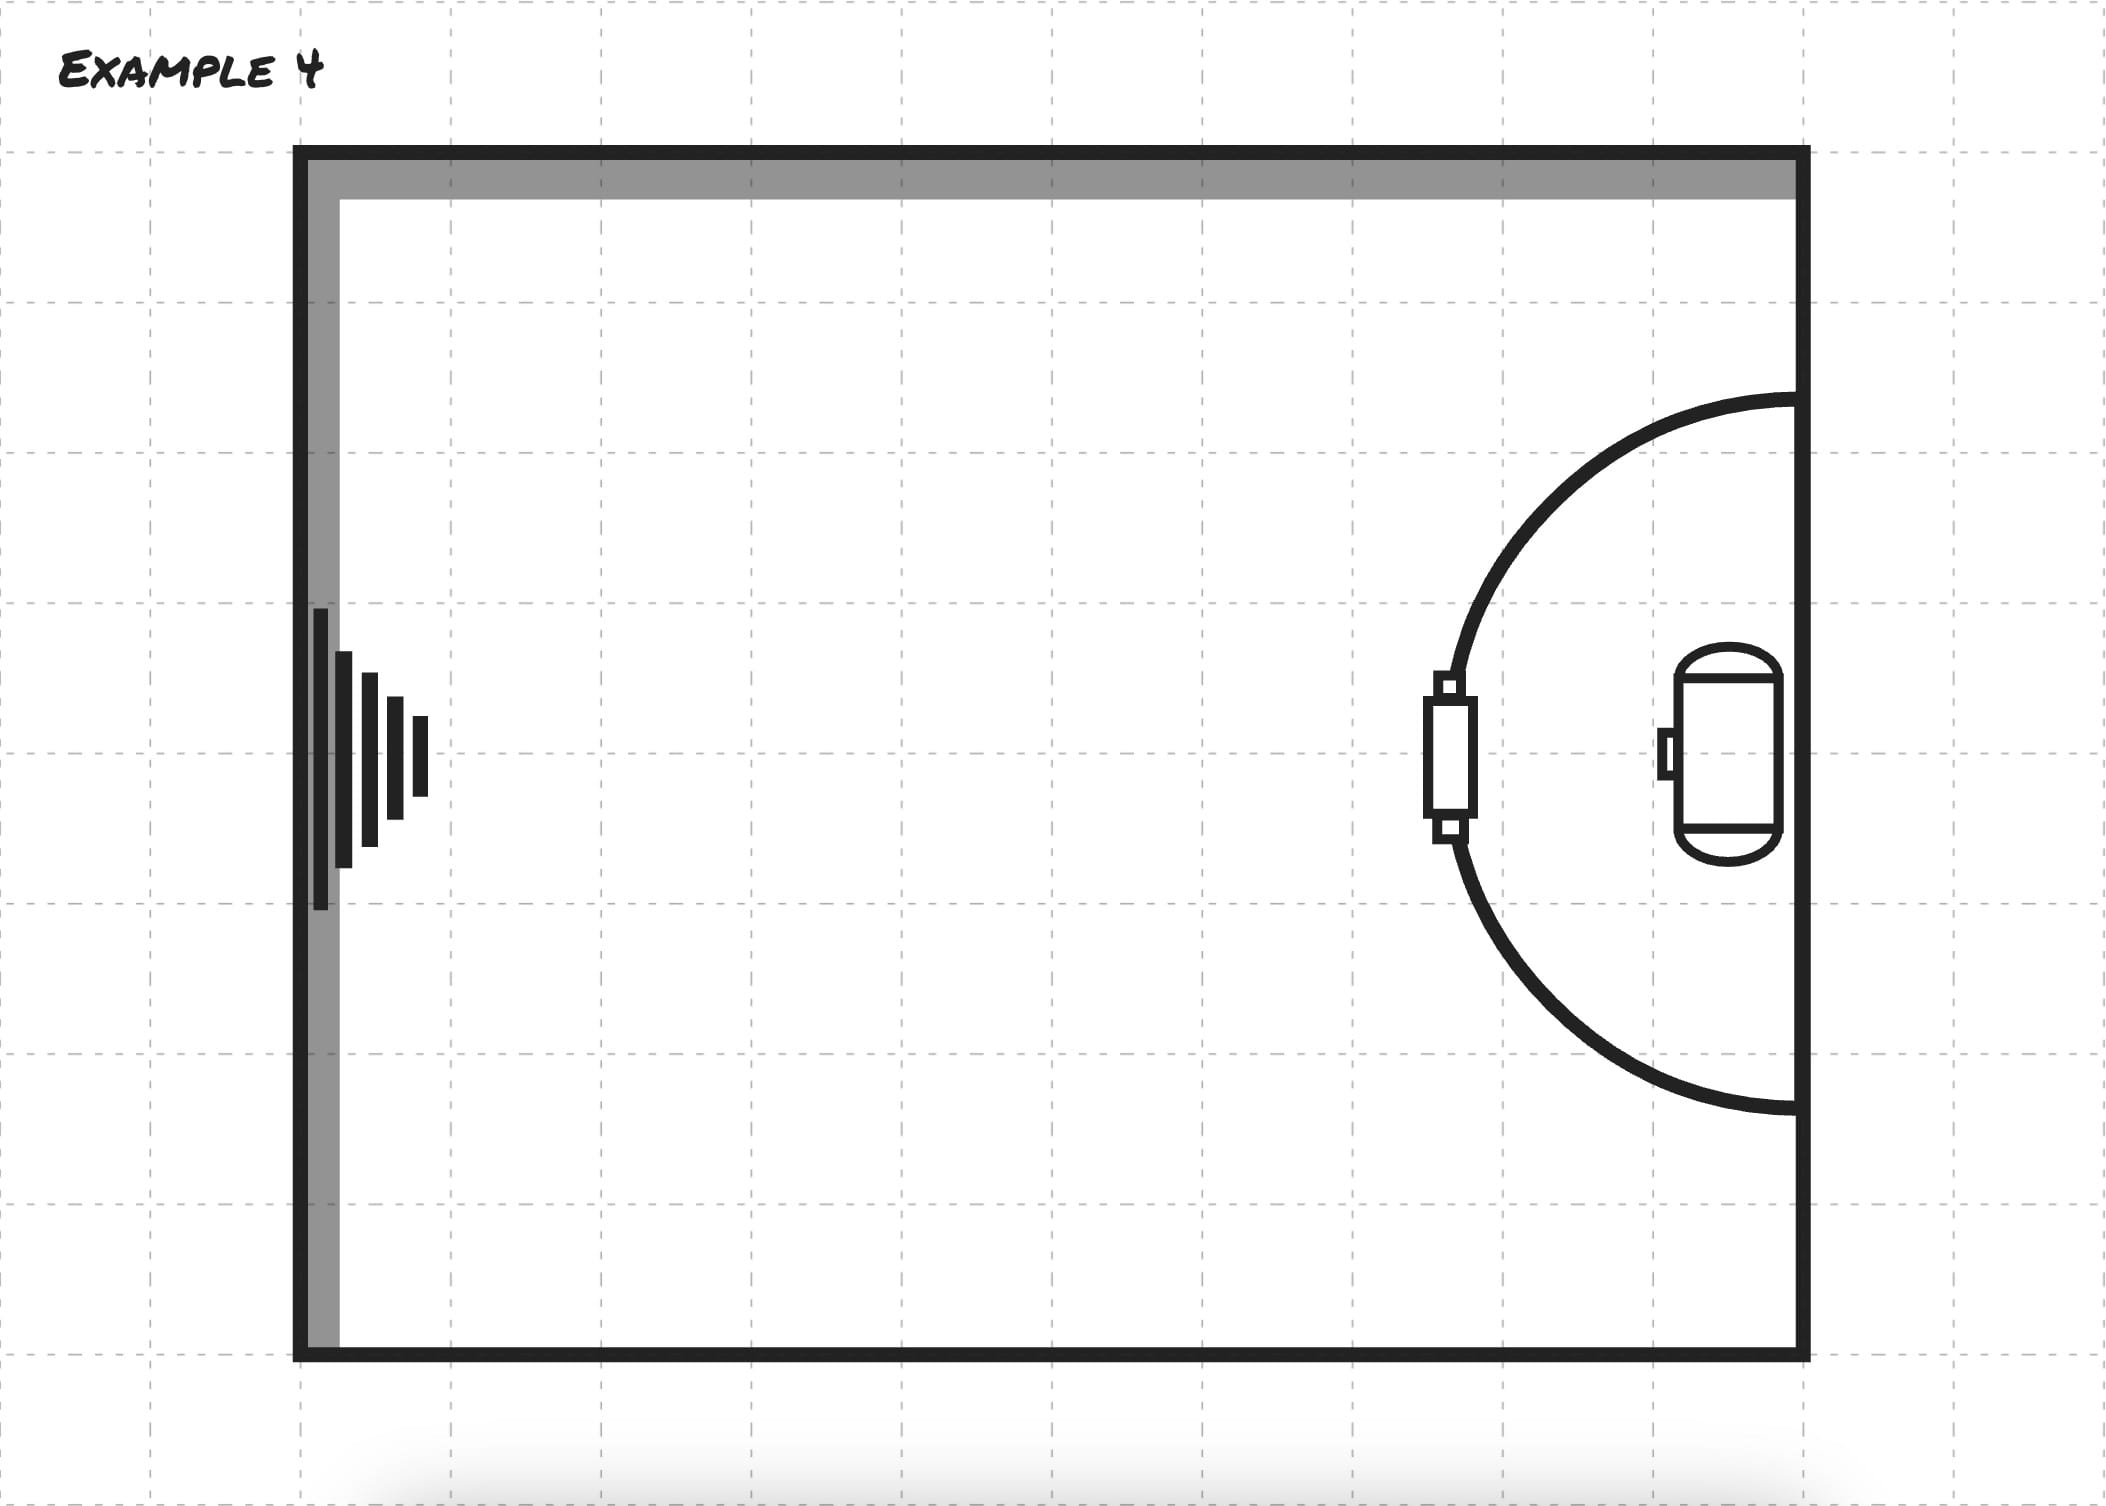
This last example will explore the single layer mode more and discuss when you may want to disable it.
This example includes a large main area on the left with a semicircle treasure room on the right.
First draw a large circle on the right side using the Circle fog mode.
Now we wish to turn this circle into a semicircle. To do this we could draw a rectangle and use the Trim option to remove half of the circle. However when we do this the single layer fog mode is preventing us from overlapping these two shapes.
To fix this you can disable single layer mode by selecting the Enable Multilayer button in the toolbar.

Draw a rectangle over the circle once more and select both then use the Trim menu option.
This method of drawing basic shapes and using the Join/Trim options is a really powerful way to add fog to maps. Especially maps that were built with a grid system in mind.
Lastly enable the single layer mode again by pressing the Disable Multilayer button and draw a large rectangle over the rest of the room.
With these four examples you should now have an understanding of the most common workflow when using the fog tool. There are a couple of fog modes we didn’t cover including the Brush mode which allows you to draw freeform fog shapes and the Triangle and Hexagon modes which allow you to draw more shapes. Lastly there is the Enable/Disable Fog Cutting action which will set the default cut value for new shapes you draw.
Real World Example
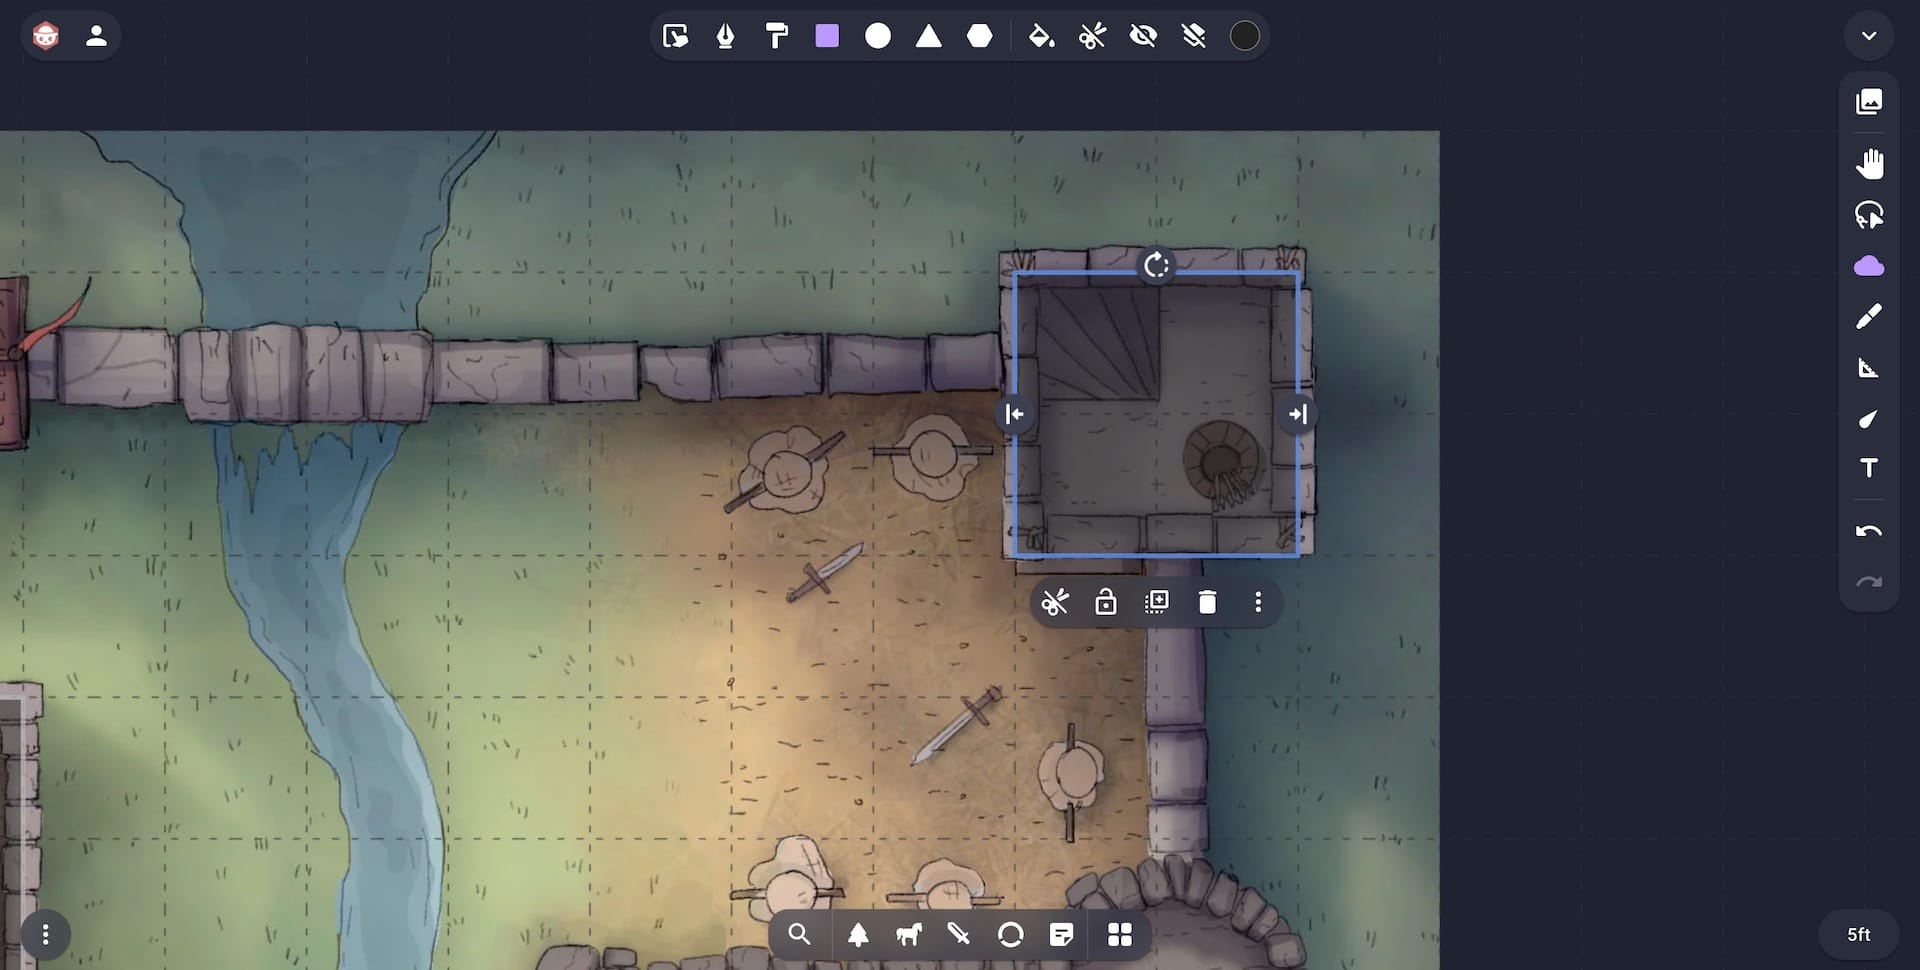
Now that you know how to use all the aspects of the fog tool we can now explore adding fog to a more complex map. This example will be less of a step-by-step tutorial and instead we will try to explore the thought process for handling a larger map.
The map we’ll use here is the Adventurers Guildhall by Czepeku.

This map can also be found in the Starter Sets section of the Scene Importer by selecting the Czepeku creator.
The first thing I notice when I look at this map is that we have many rectangular rooms. These simple shapes will make a great place to start as they will be quick and easy to draw.
Below is a video showing the process of adding fog to all these rooms. For the rooms that are the same exact shape I will use the grab tool to duplicate that shape across the rooms.
During the above video you will notice some moments where I move the viewport while drawing a shape. You can do this by holding down the spacebar as you draw. This technique is very handy when you need to draw a larger shape but also wish to be zoomed in.
The last two rooms of the house are more complicated shapes. However we can rely on the single layer feature to take most of the work out of it for us. For the room on the left we will draw a single rectangle that will be cut into the shape we need. For the hallway on the right we can draw a large rectangle for the interior and then another rectangle for the bottom exterior. We can then join them together to create one shape.
Now that the interior of the guildhall is done we can move on to exterior rooms such as the stables and battlements.
To start with I’ll add some square fog shapes for each of the four guard towers.
Next I’ll add a rectangle for the stables. Zooming in on the stables you will notice that it doesn’t neatly line up with the grid as some of the other rooms did. To make this easier to fog I’ll hold down the Ctrl/Cmd key as I draw my fog shape to disable grid snapping.
The same grid snapping technique can also be done for the altar in the top left.
Next I’ll add two more rectangles for the armory and workshop in the bottom right.
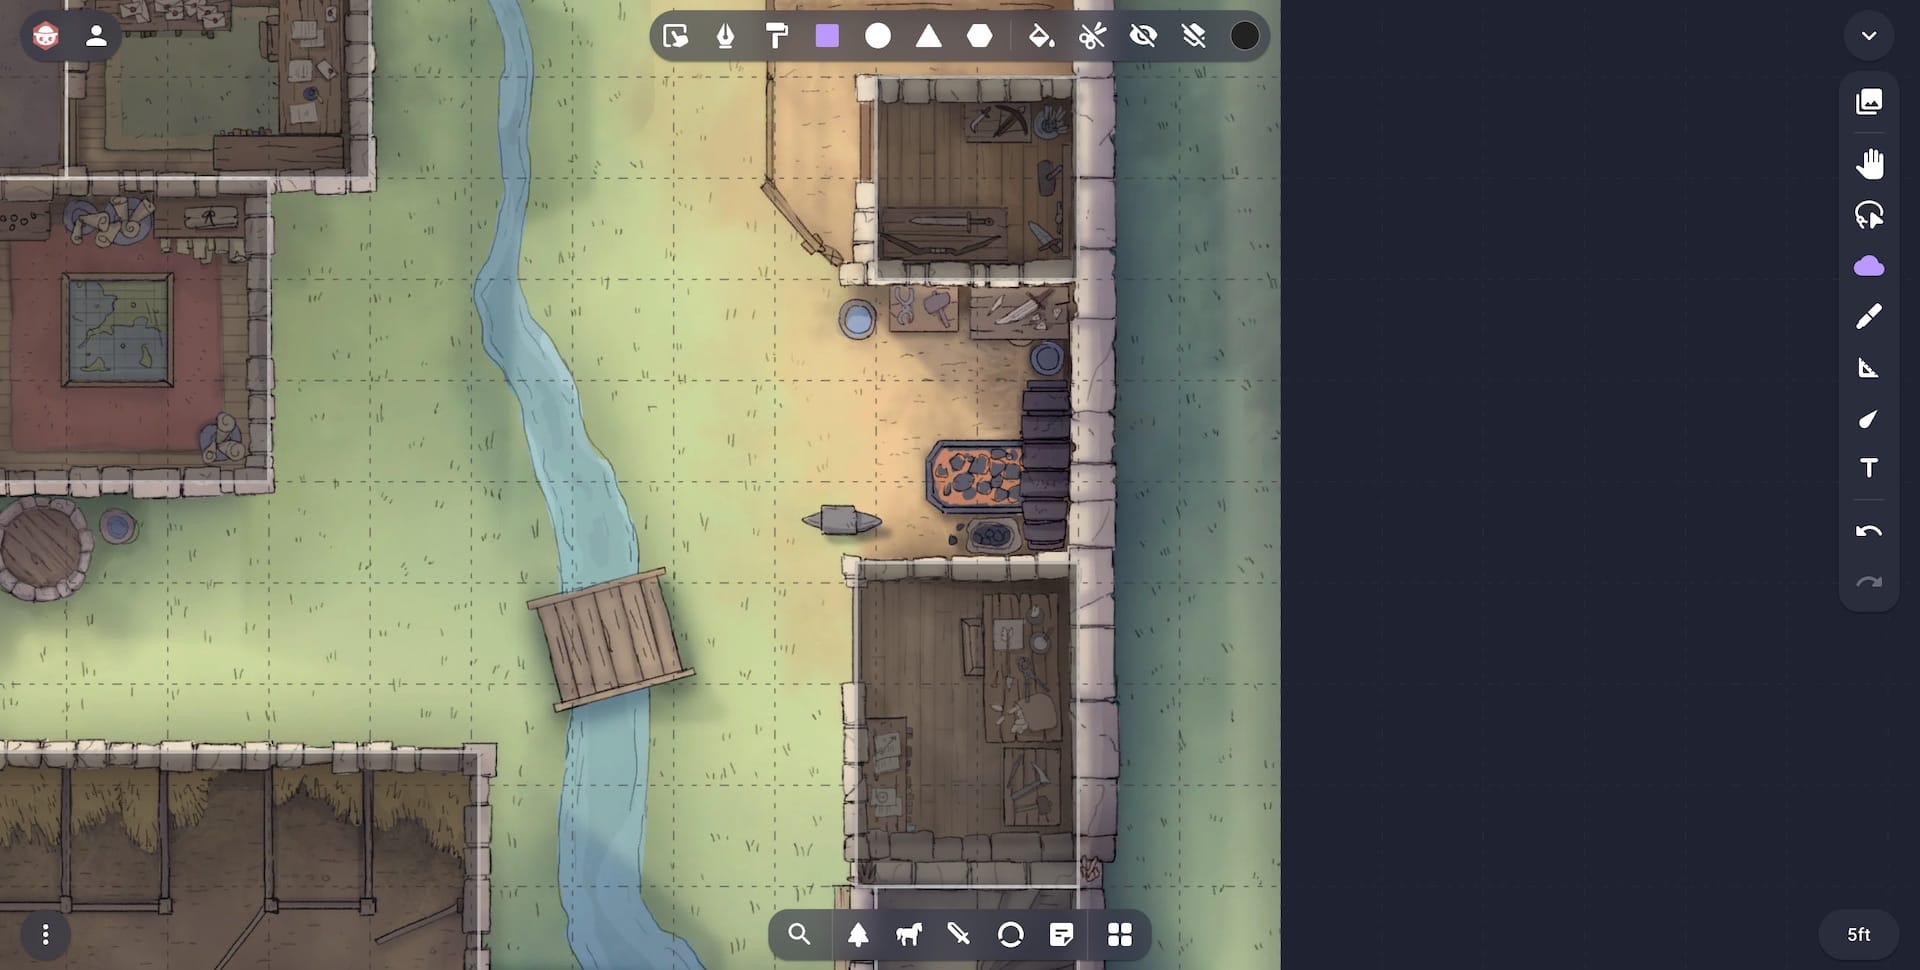
Finally we can finish with the circular tower in the top right. For this I’ll use the Circle mode and after I’ve finished getting the correct size for the circle I’ll hold down the Alt/Option key to move it into place.
Now that we have all the fog shapes in place we will want a few final pieces to run this as an encounter. If we enable Fill Fog so that we can hide the size of the map from the players we will be able to cut out each room as we go.

However because we never made cut outs for the grounds we won’t be able to show them to the players.
Normally this would be a very complicated shape to make however since we’ve already cut out all other rooms we can simply drag a rectangle over the entire map and the perfect shape will be made for us.
Now to run this encounter you can add your player tokens and as they enter each room you can select the fog shape and cut it out to reveal the map underneath.