Hosting your Extension
This tutorial provides instructions on how you can deploy your extension as a site on a Web Hosting platform.
We will be using our Dice plugin as an example of deploying to Render.
Choosing a platform that works best for you is something that only you are going to able to decide and what may work for you now may change as the usage on your extension changes. We have included details about some other Website Hosting platforms and almost all of the platforms mentioned in this tutorial have a free tier offering.
Render
Render supports different options for site hosting and also has options for creating environments for your pull requests. They will also provide a URL hosted by them if you don't want to purchase a domain for your extension. They have a free tier but you should check their pricing page for bandwidth and build minute limits.
You can find their documentation about their static site offering here. This page may also be useful if you're using a different Javascript framework than we are.
Create a Render Account
If you don't have a Render account, you'll have to register for one.
You can find their sign-up page here.
Create a Static Site
Once you've created an account and/or logged in, you should land on Render's Dashboard.
If you've never deployed a Static Site on Render before then your page will look something like this.
We want to create a new Static Site. To get started on we can select the New Static Site button.
You can also select the New button in the top right and then choose Static Site from the dropdown.
Connect with GitHub
When you deploy your service, you have the option to connect with your GitHub account. This will allow Render to see changes to your repository.
When you do this you will be redirected to GitHub to allow Render access to GitHub.
Render provides detailed documentation and troubleshooting tips at this page.
You also have the option to connect with GitLab or just enter a Git repository url if your repository is public. You may not have access to certain features on Render if you decide to use the public Git repository option.
In our case, we're going to connect our GitHub account so we can auto-deploy and PR previews.
Once you've connected you GitHub account, you can use the search to find your repository or scroll through the list.
Configure your Deployment values
Now that we have chosen the Dice repository to deploy we can fill in the deployment values we need deploy our site live.
Our Dice extension is pretty simple, we'll call the service dice and our deployment branch is going to be main. The service name is permanent and cannot be changed once created, if you want to change the name later you'll have to delete your service and deploy again.
According to our scripts our build command is yarn build. Our build output is ./build.
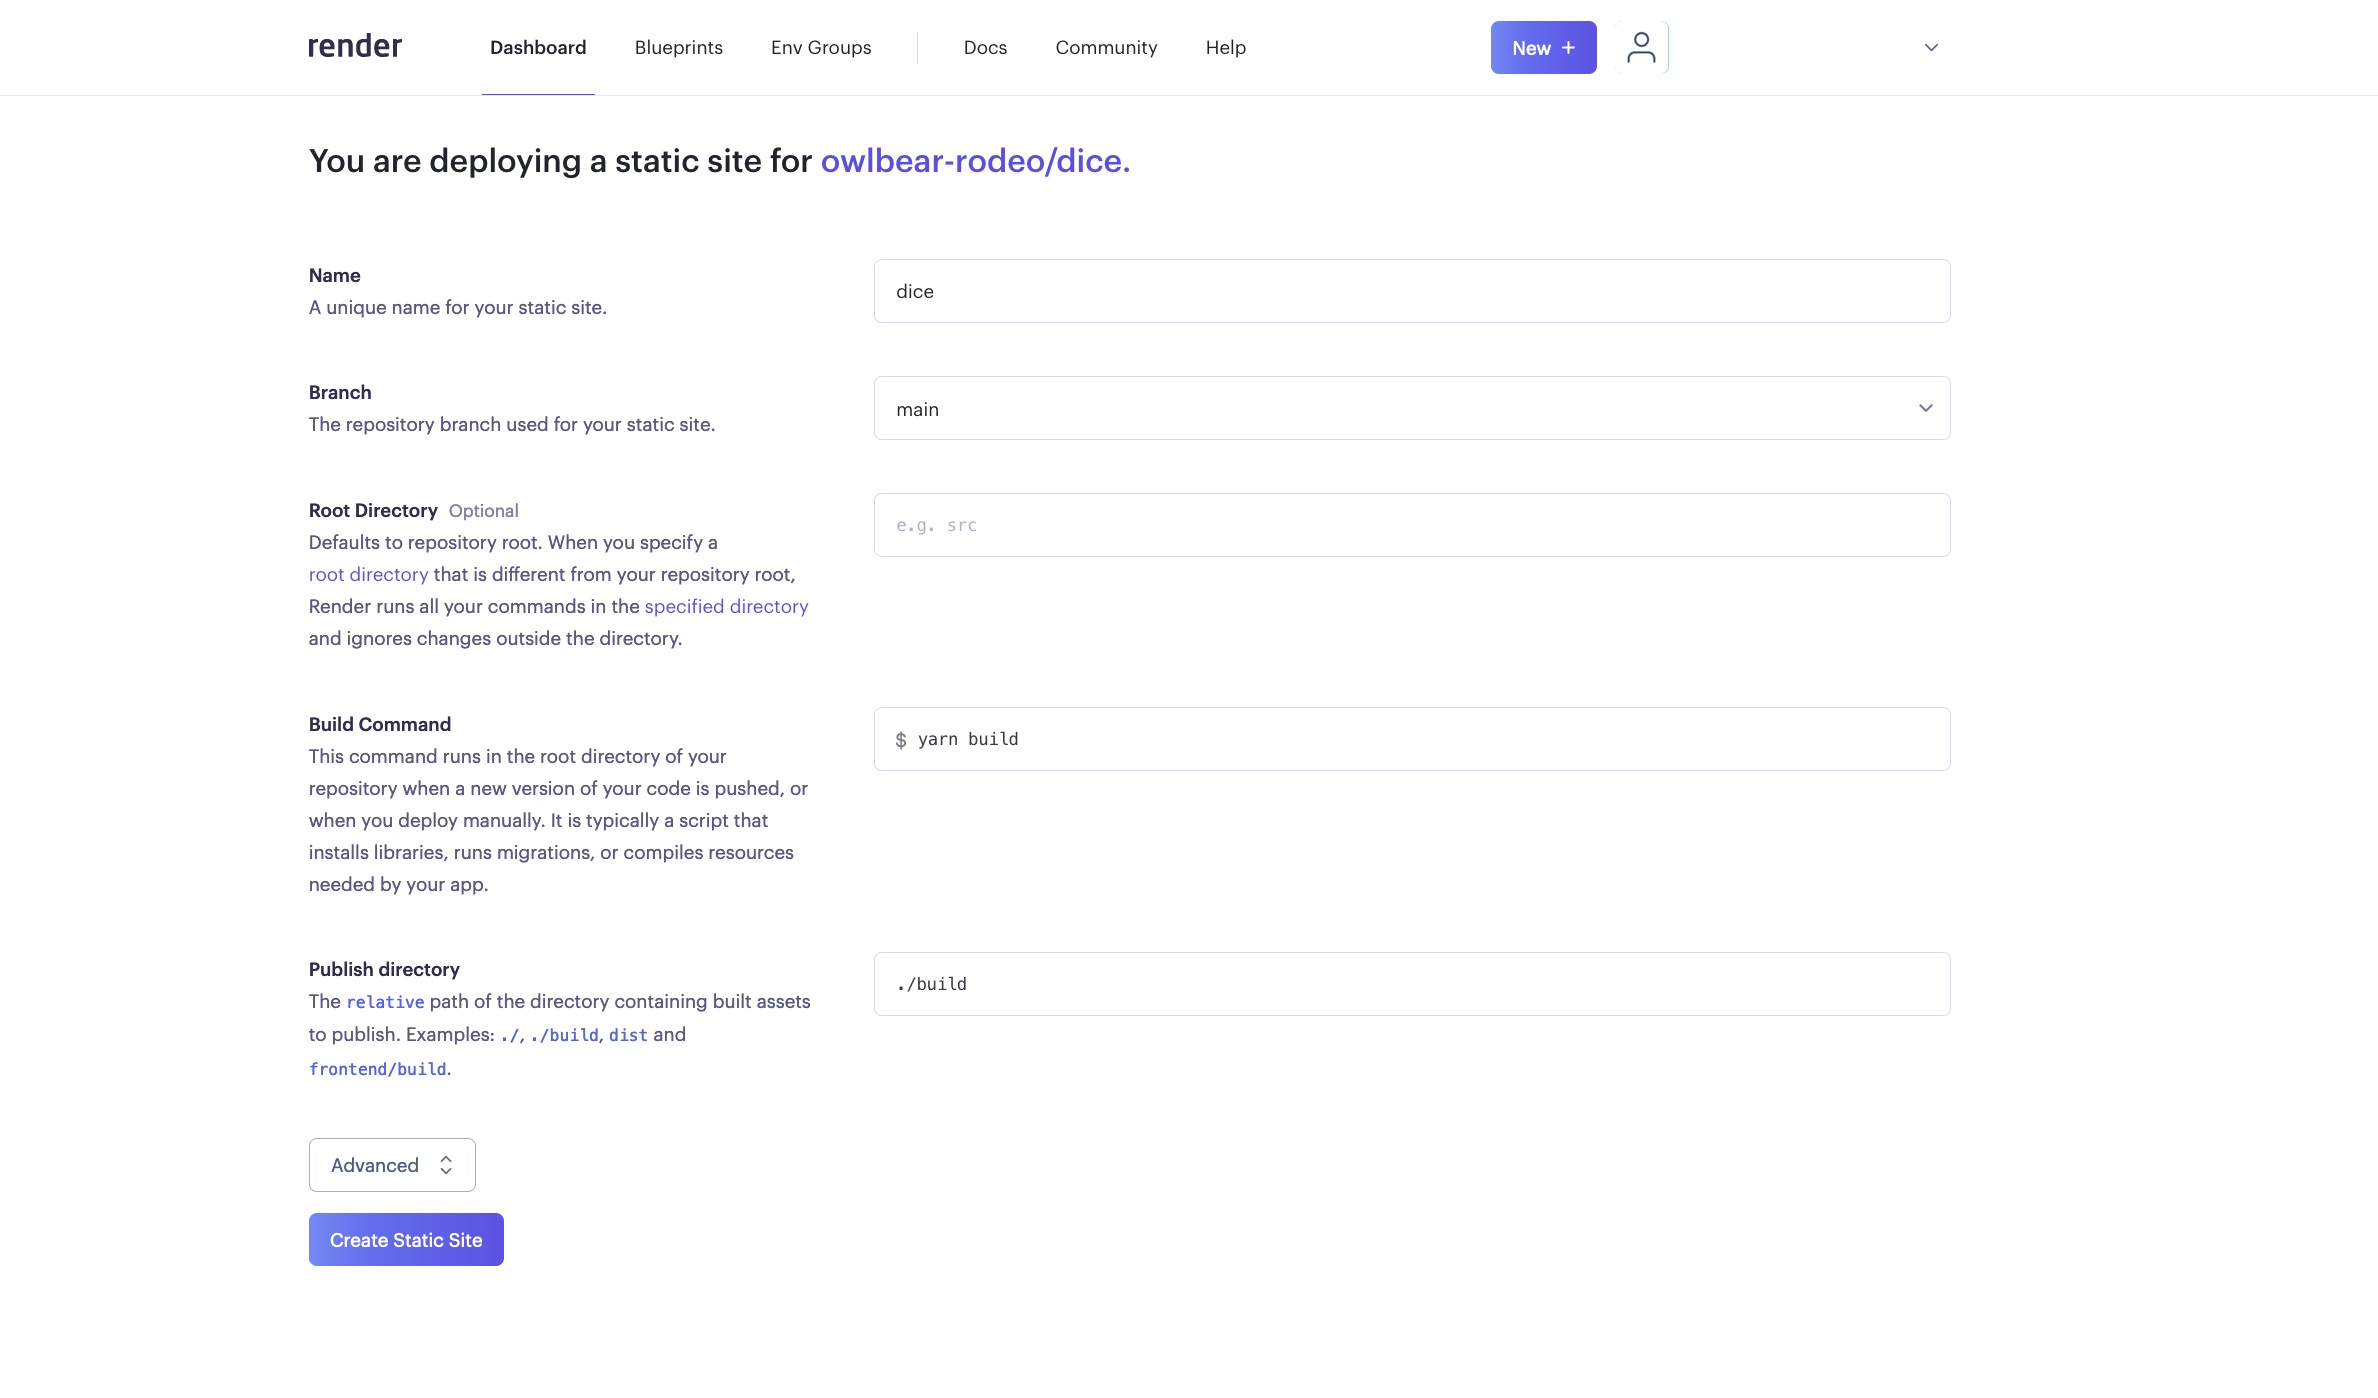
We don't have any environment variables for this plugin but if you do you'll need to configure them in the Advanced section.
Once we've filled in these details, we can select Create Static Site.
Configuring the Settings
While building it looks like the deployment threw an error.
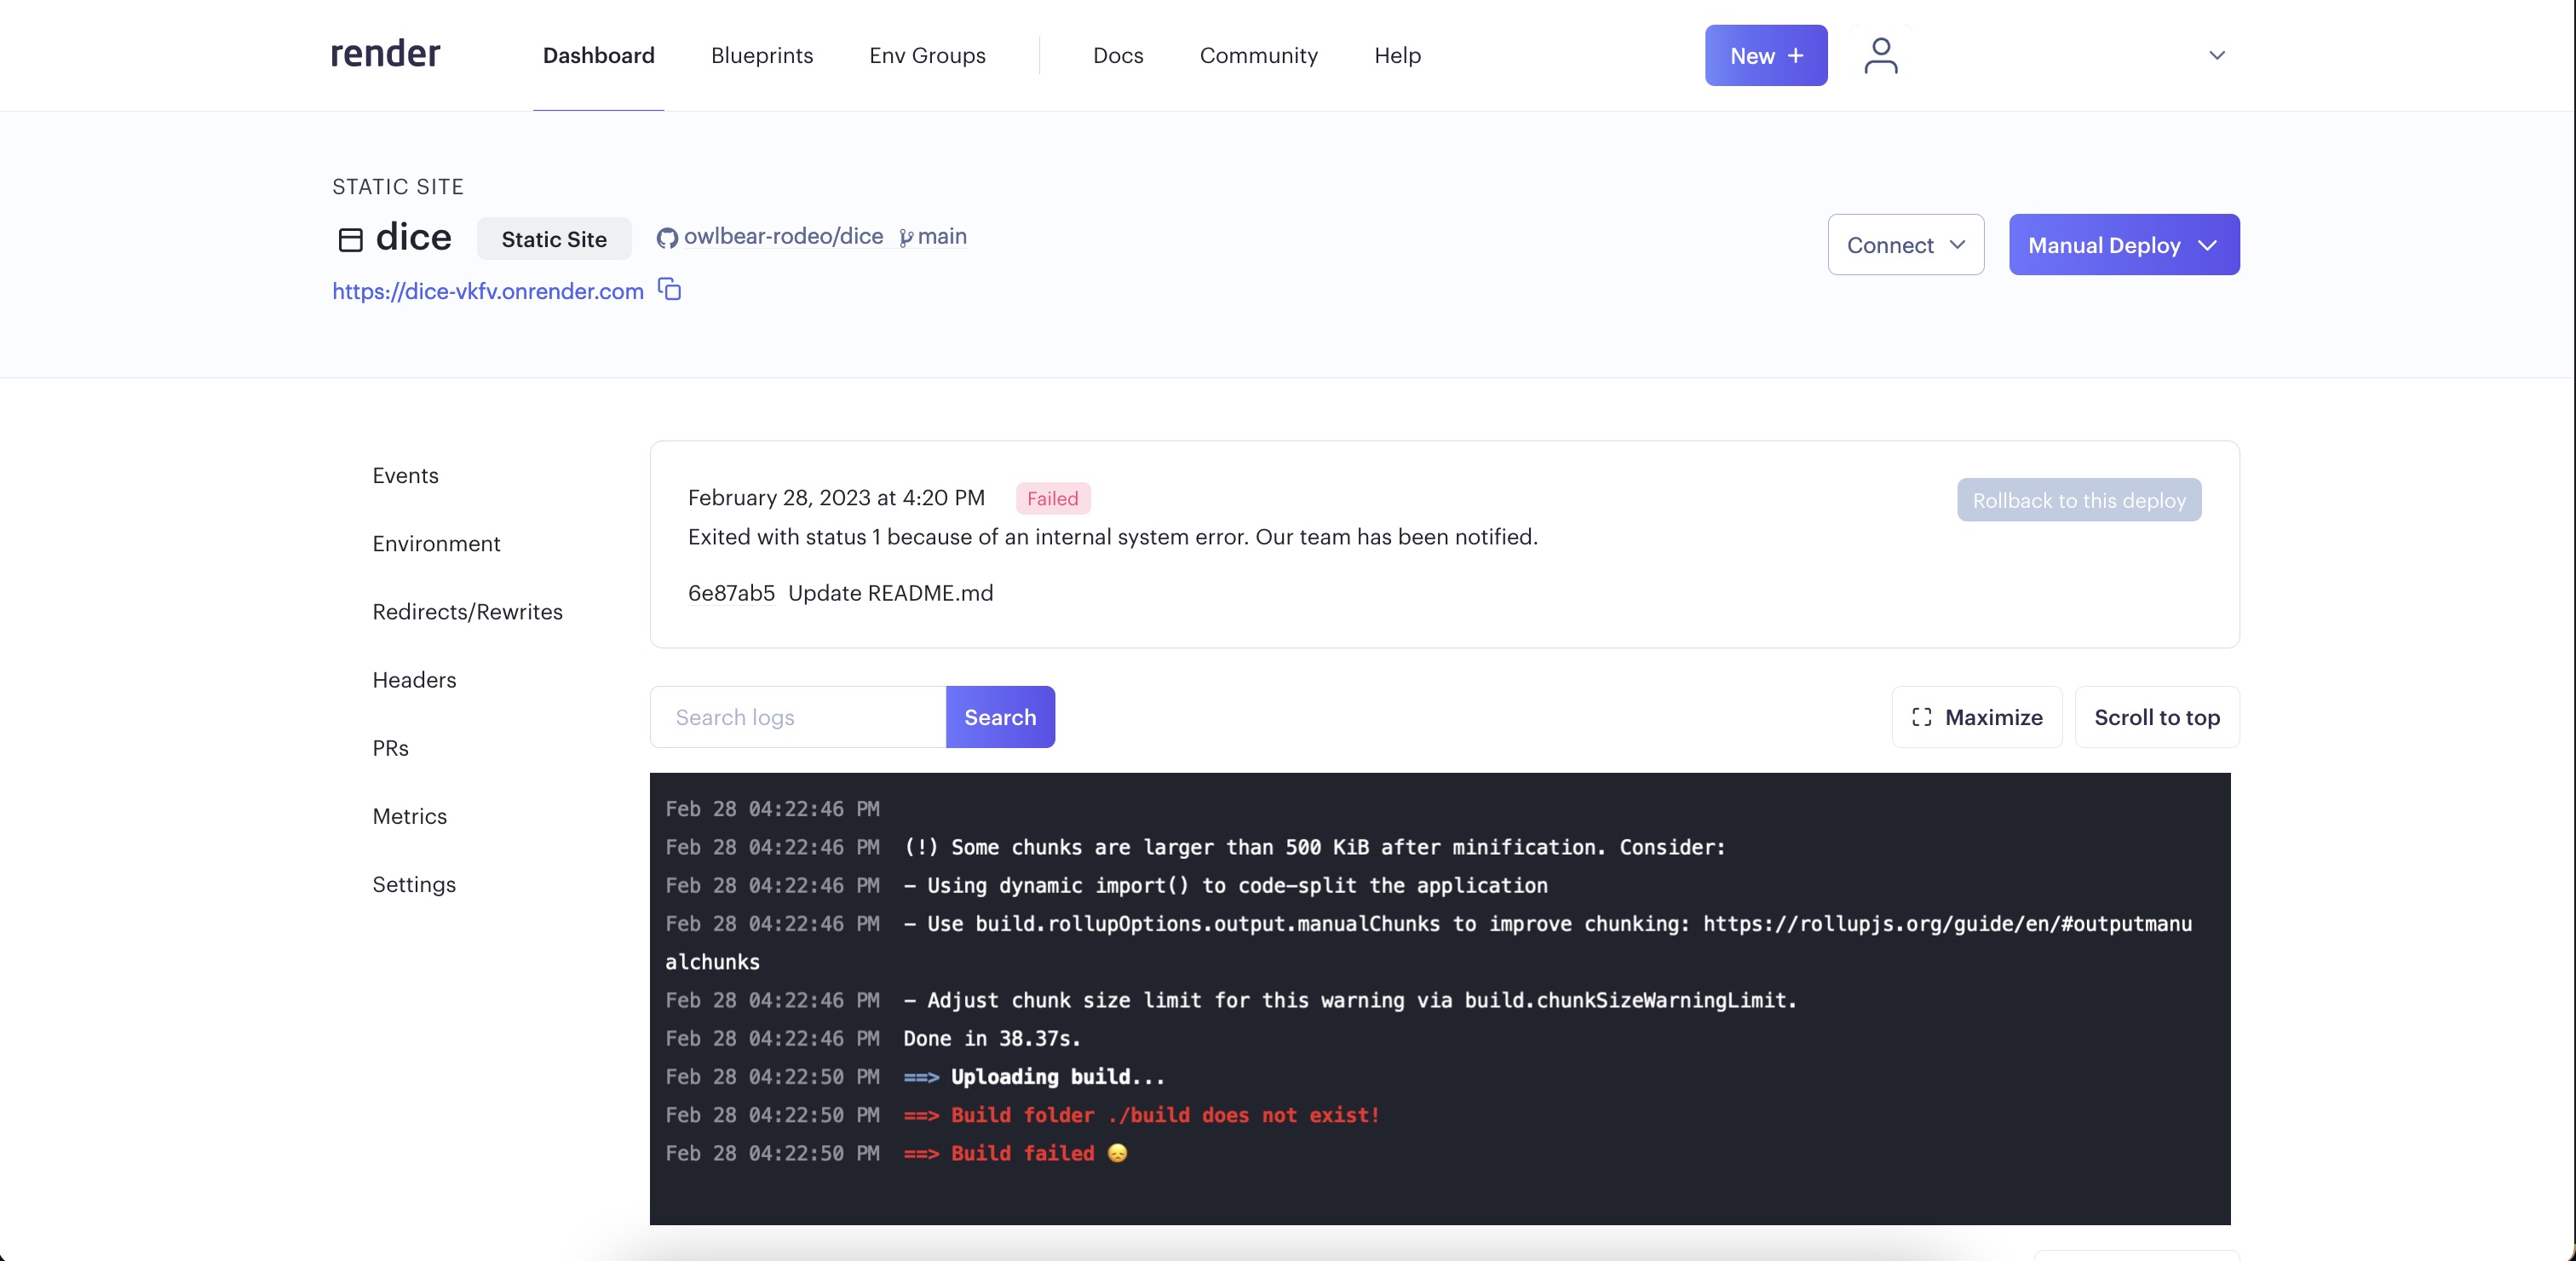
It seems that I configured the output directory incorrectly. To fix this I can go to Settings on the left hand side and then edit the Publish Directory value.

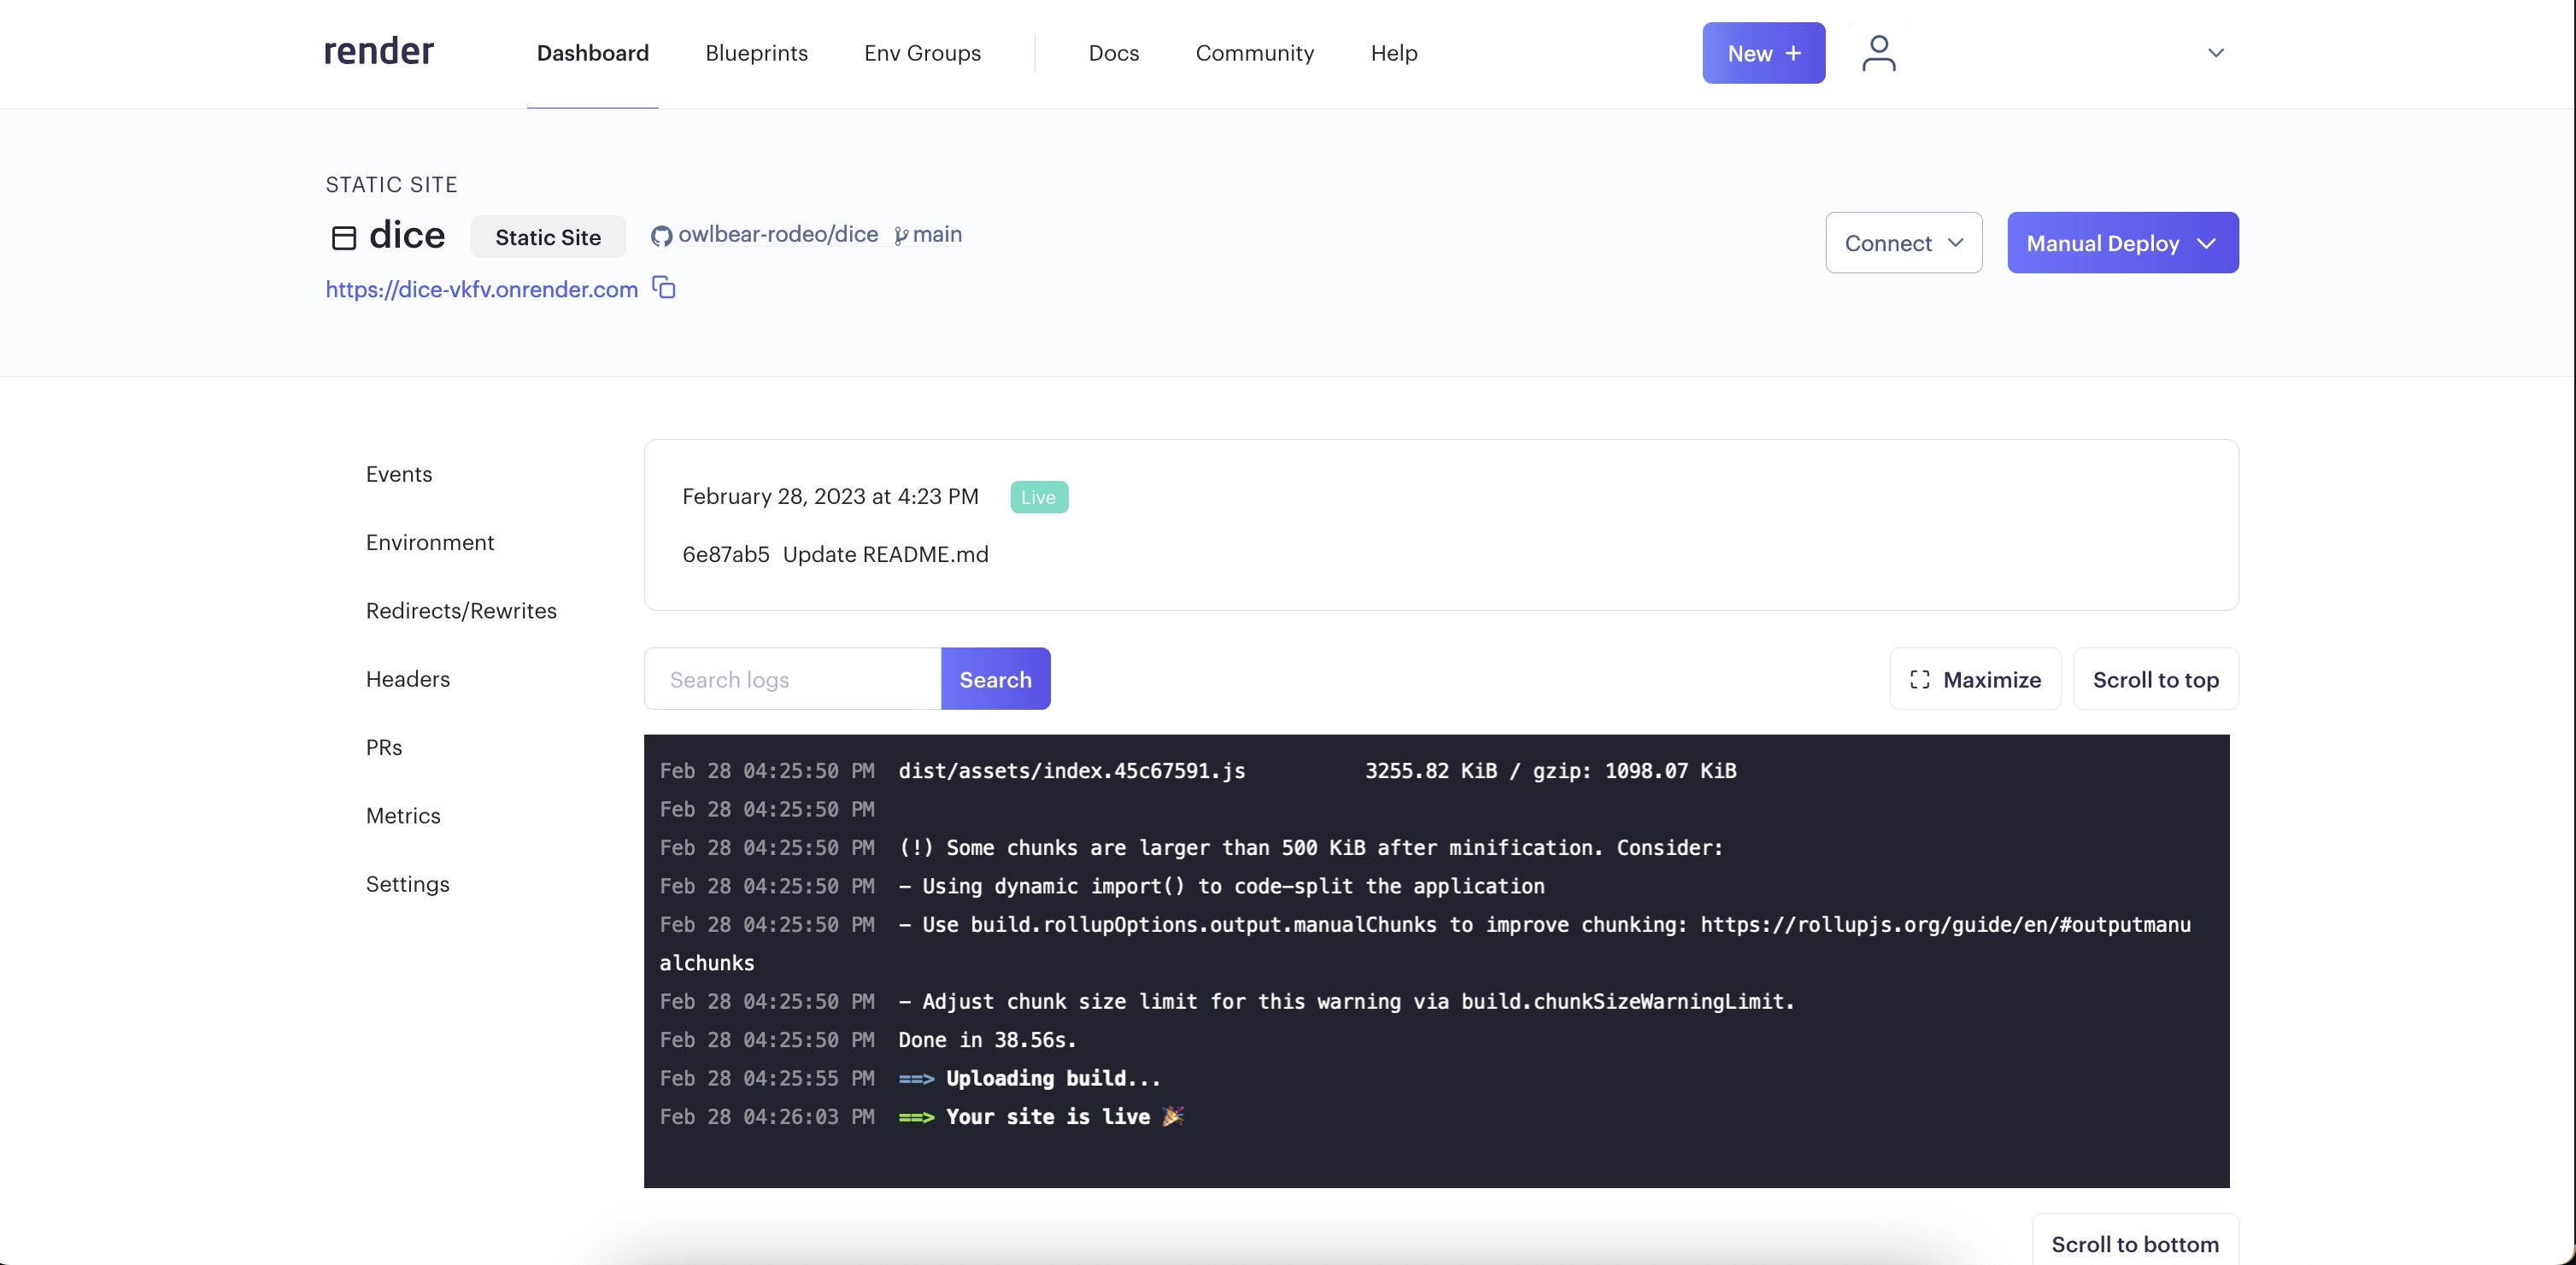
Once I've changed it to ./dist and hit save I can go back to Events. It looks like Render automatically re-deployed after I made this change.
It looks like our site is finally live!
Viewing the Extension's Static Site
The Dice extension is finally live. Render has already given us a public URL to view it from.
We can find it under the service name in the top left.
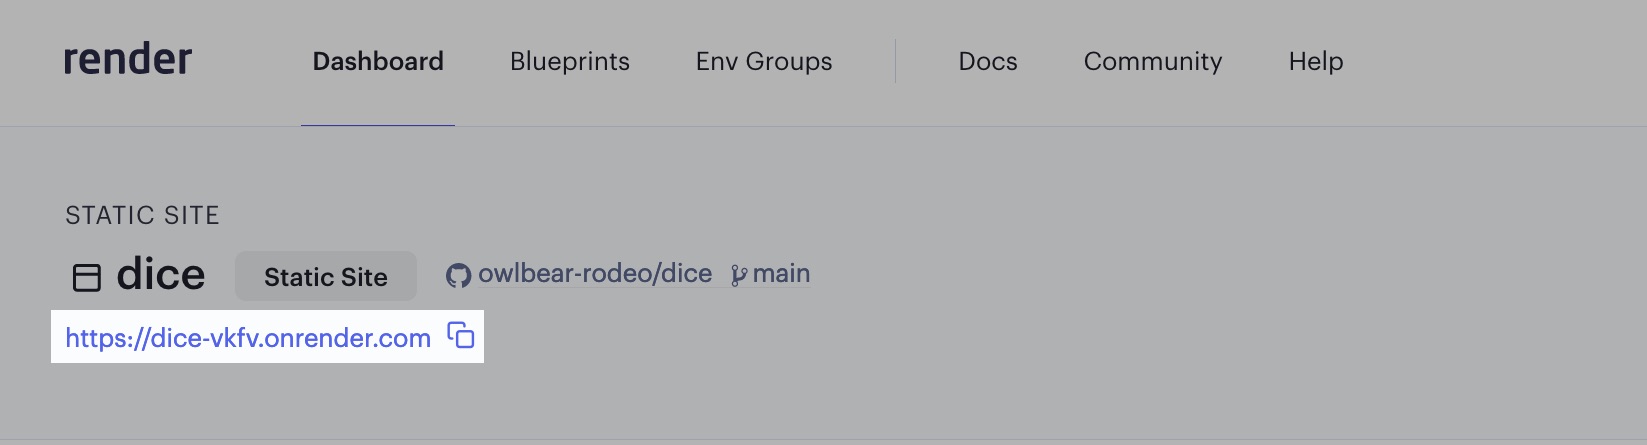
Clicking on it will show the Dice plugin's static site.
(Optional) Allowing CORS
This step may not be necessary on your part. Owlbear Rodeo makes "safe" requests which mean that CORS should not be necessary but be sure to test this with your extension. If you're getting errors about CORS then you may need these headers.
Our Dice extension is ready to use with Owlbear Rodeo, however sometimes cross-origin headers can be necessary.
In Render go to the Headers section on the left. Here we can add an Access-Control-Allow-Origin header to allow Owlbear Rodeo 2.0 to fetch your extension.
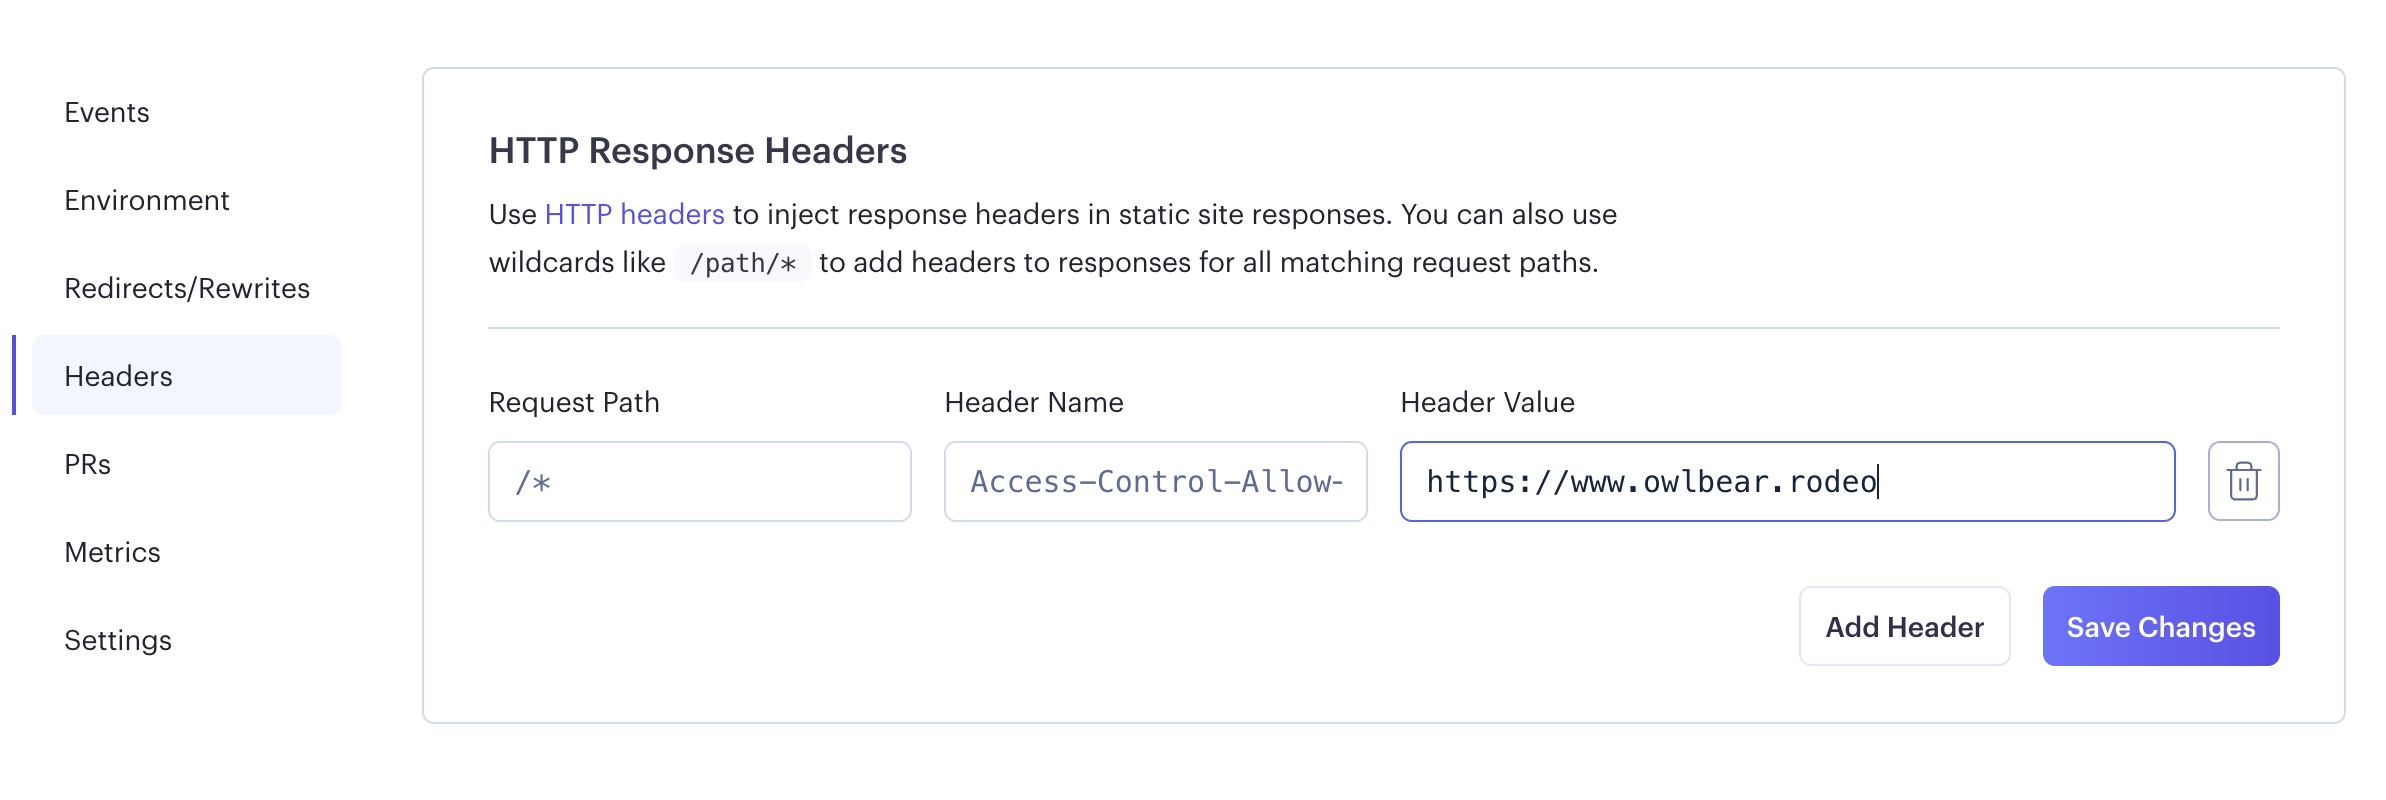
In this extension we're being more strict and only allowing requests from https://www.owlbear.rodeo but if you want to be more permissive you can specify * which will allow requests from any site.
If we want we could stop here and just use the Render URL as the offical link for the extension. We could also create a custom URL with a custom domain.
(Strongly Recommended) Adding a Custom Domain in Render
This step is optional but it is strongly recommended. This gives you the flexibility to move to other hosting services without worrying about users loosing access to your extension.
There are a few sites that allow you to purchase domains but be aware that some don't have good reputations and will inflate prices.
This tutorial assumes that you know how to purchase a domain yourself. We recommend Hover or Porkbun if you haven't already chosen and purchased a domain.
To add your custom domain to Render, go to the Settings on the left hand side and scroll down to Custom Domains section. You should select Add Custom Domain.
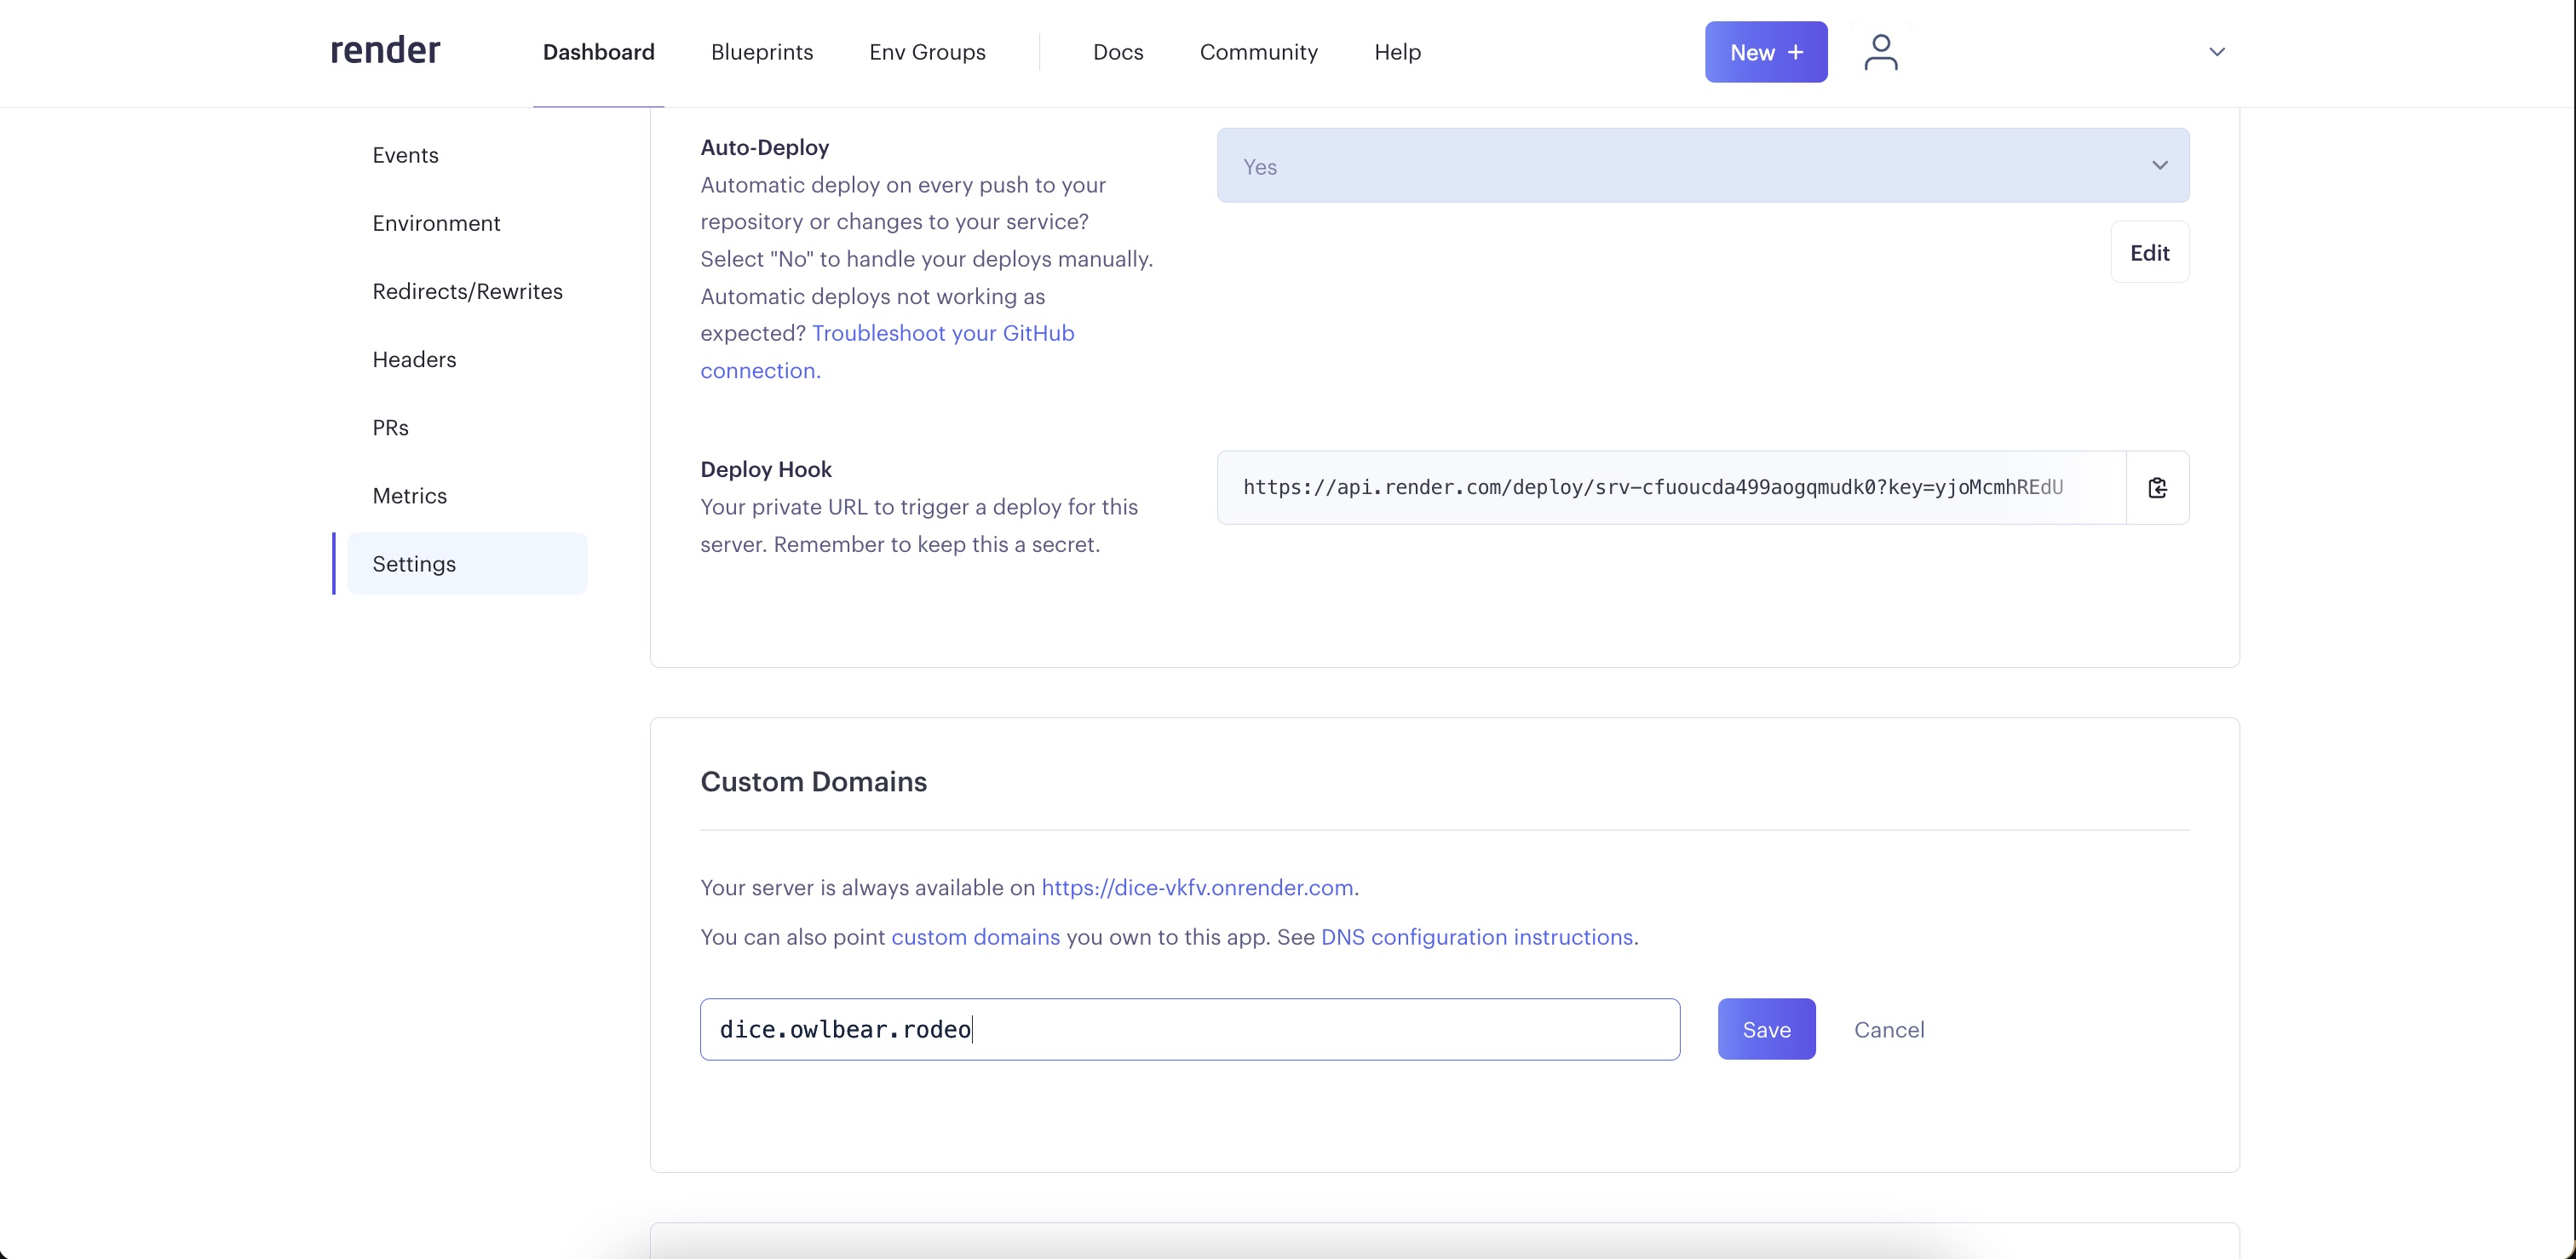
I'm going to choose dice.owlbear.rodeo as the domain for extension. I'll then go to our domain provider to enter a CNAME record pointing to the Render URL.
Render has some instructions on configuring DNS here.
Once you've entered the record in your DNS select Verify in Render. It may not work immediately but keep trying every few minutes until it resolves.
It can take up to 72 hours for DNS records to update, usually it's much shorter than this but it's something to be aware of.
Once Render verifies our DNS record they also create an SSL certificate for us. Now we can see the Dice extension's static site at https://dice.owlbear.rodeo/ and use that URL to share it with others.
Alternatives
Cloudflare Pages
Cloudflare Pages is Cloudflare's static site solution and runs on their edge network. It gives you unique URLs for your branches, as well as your commits. It has generous free tier with some limits on build minutes and custom domains. You can find more information about pricing here.
If you're using a custom domain, you don't need to have it in Cloudflare to be able to use Pages.
Vercel
Vercel is a popular static site solution and the go-to for developers using Next.js. It has a free tier, which has some limitations on build minutes and bandwidth. You can get a full breakdown on their pricing here.
DigitalOcean App Platform
DigitalOcean is well known for it's cloud offering and now they also offer free website hosting as part of their App Platform offering. You can find the details about the pricing for App Platform on their page.
Others
There are many website hosting platforms available, the ones above are just those I have personally used. Other options include Heroku and AWS Amplify. There's likely many others that I haven't heard of.