Aligning a Map
Owlbear Rodeo uses a grid system to make it easier to run your encounters. By default your scenes will have subtle grid snapping to make it easier to move your characters. The ruler tools also rely on the built in grid to take accurate measurements.
Custom maps will often have their own grid which means to use them you’ll need to align them with your scene. Some maps are designed to be used with software like Owlbear Rodeo and are easy to align. Others are designed to be printed and can be harder to align. Either way the grid alignment tools in Owlbear Rodeo are designed to be easy to use.
Alignment Tools
In Owlbear Rodeo there is a single set of alignment tools that can be used wherever a map is used. These tools consist of a set of controls that allow you to manually set row and column values for your grid.

If you don’t know the row and column values you can also use the alignment rulers which will visually align your grid.
There are three main places where you will see these tools:
- Before the scene is created in the Scene Importer
- After the scene is created when the scene is open
- In the Image Editor when adjusting the default values of a map
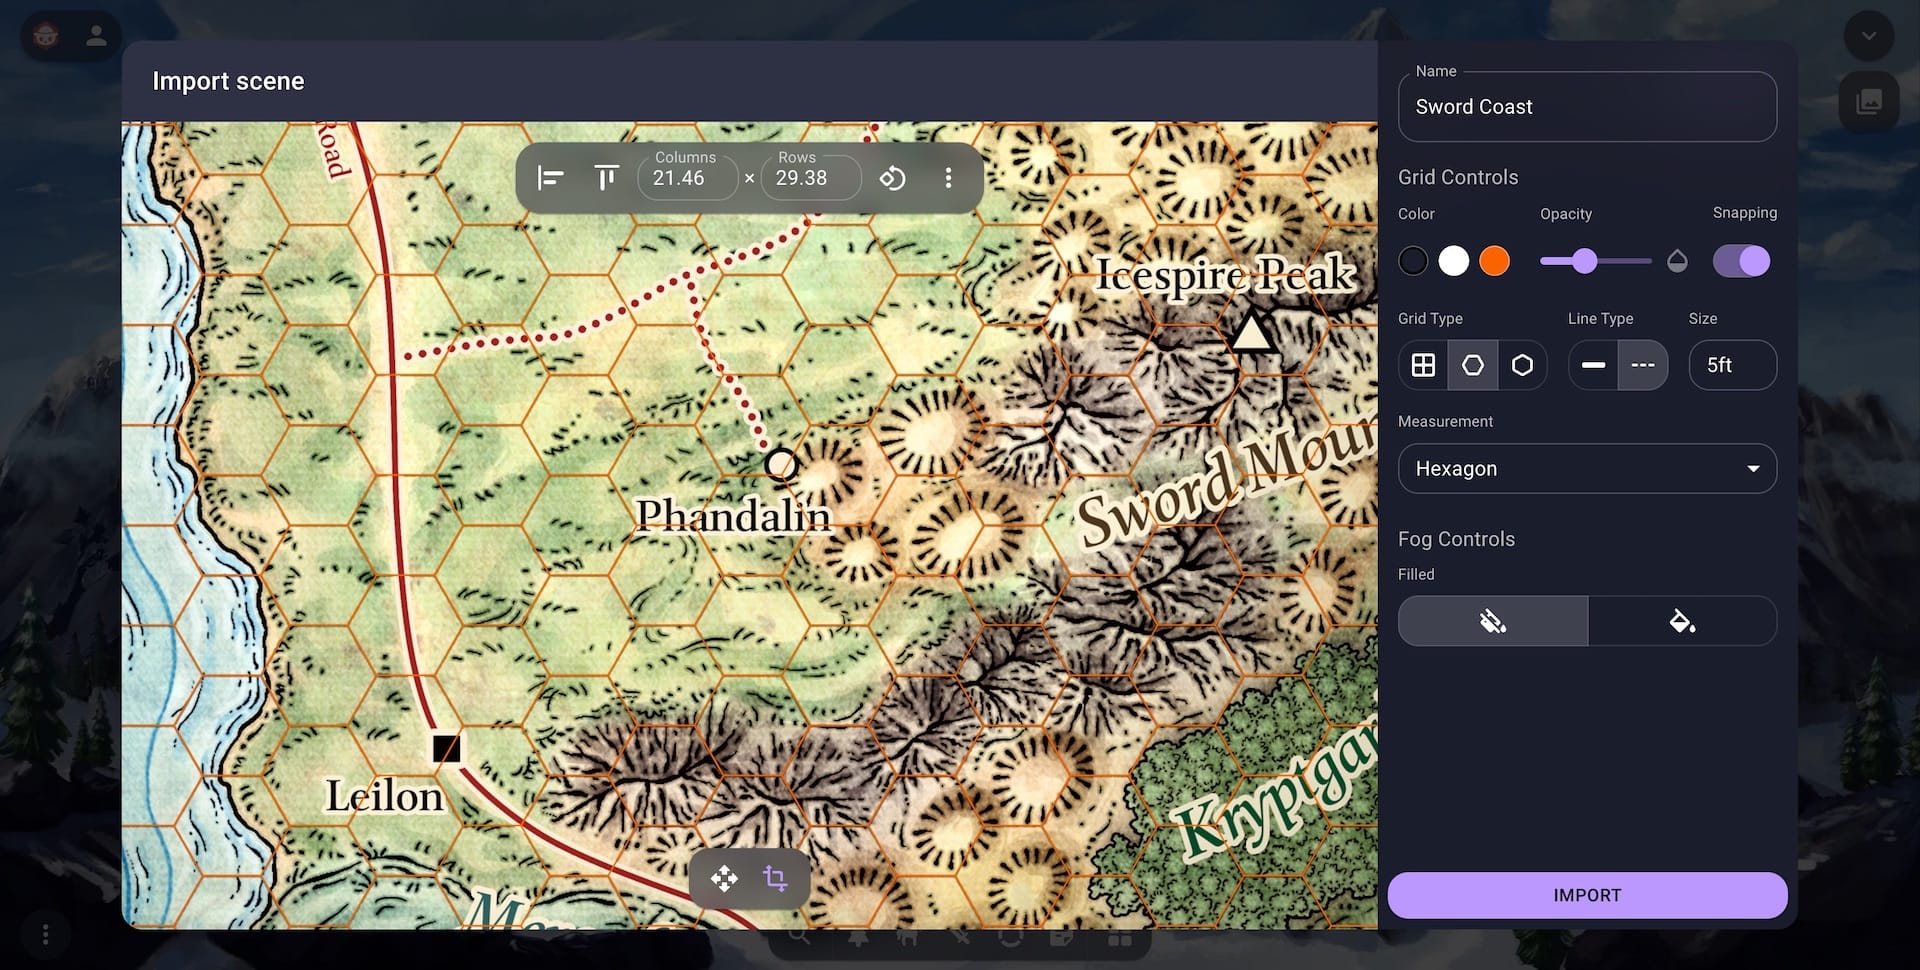
Scene Importer
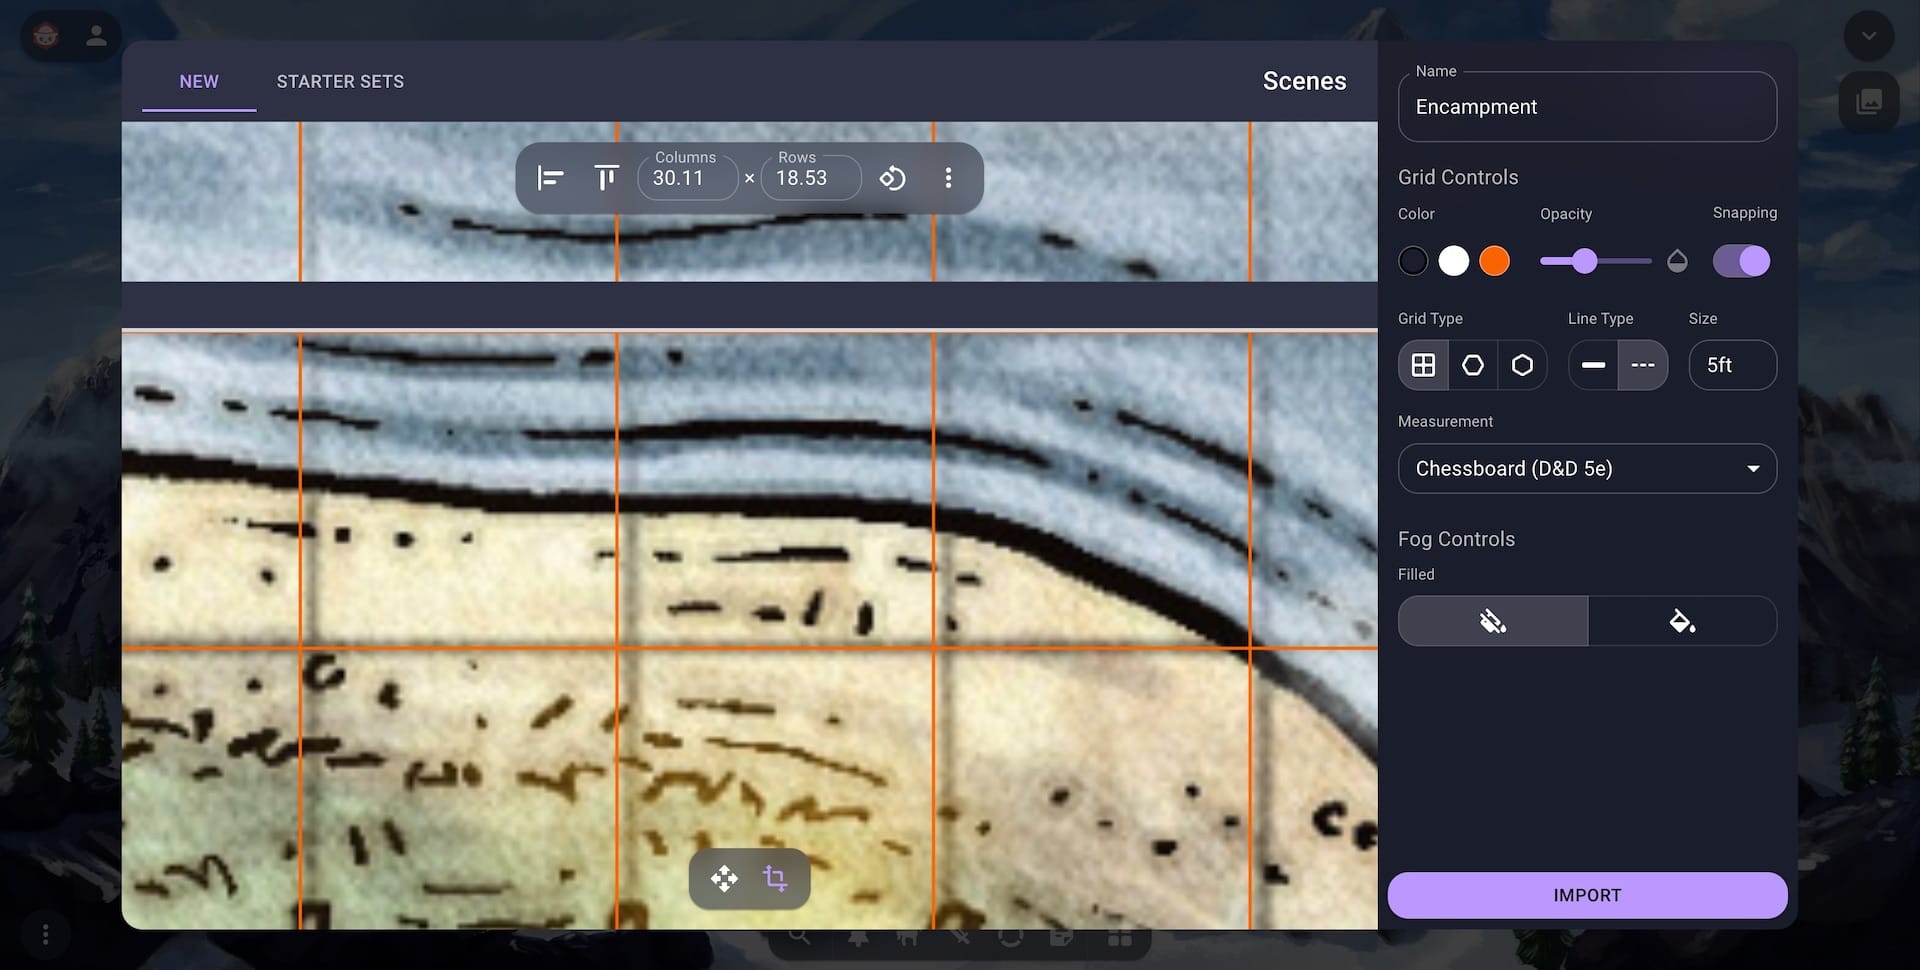
When importing a scene and a map together you will be able to align the grid during the import process. The Scene Importer is found by clicking the Add button in the Asset Manager when the Scene tab is active.

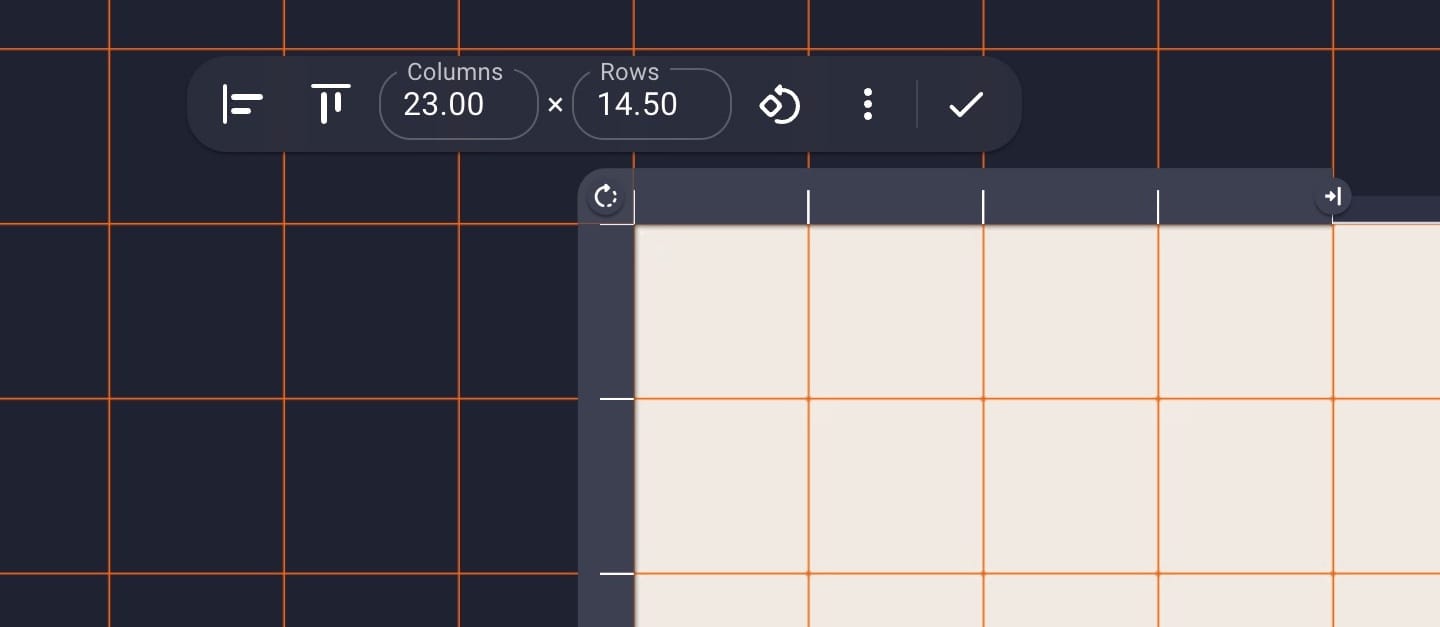
The manual grid controls can be found on the top of the editor while the alignment rulers can be activated by selecting the Transform button in the bottom toolbar. When the Transform mode is selected the grid will turn into a solid orange line. This is done to make it easier to see whether the alignment is working.
The Scene Importer will be the place where you most frequently encounter the alignment controls.
For more information about the Scene Importer see here.
Scene
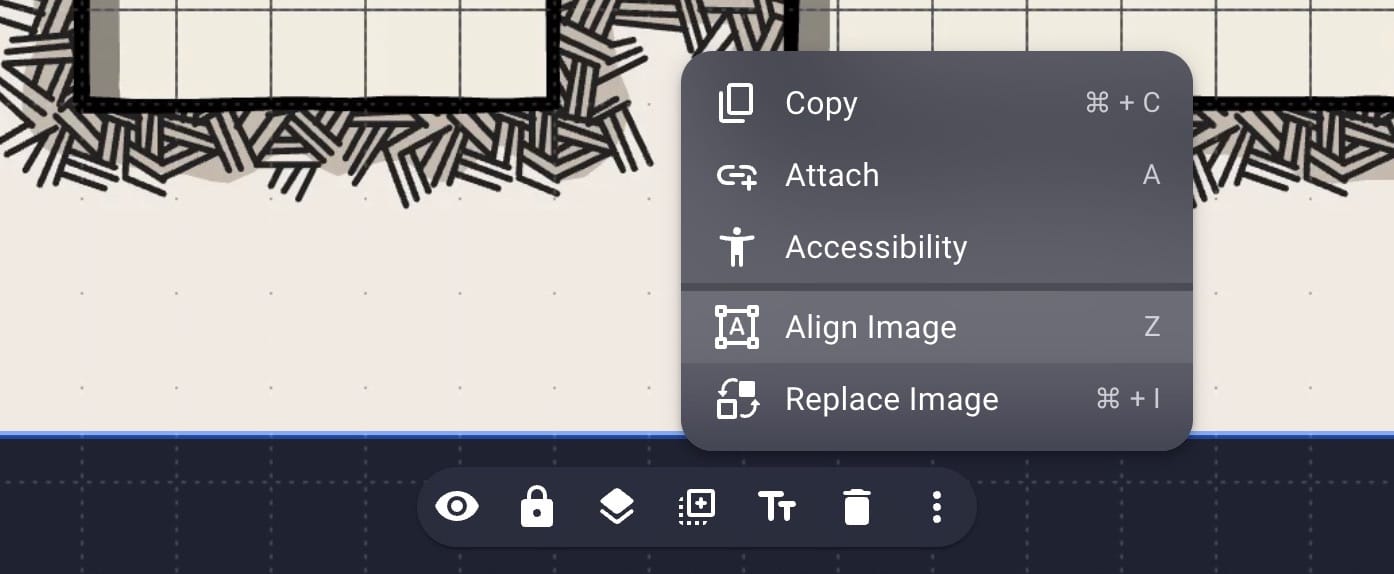
After a scene has been created you can align a map while the scene is open. To access the alignment options select the map you wish to align. This will most likely require double clicking on the map. This is because by default maps will be locked so you don’t accidentally move them. Once selected you can either select the three dots in the Context Menu or right click to find all the options. In the overflow menu select the Align Image menu item to align the selected map.
When in the alignment mode the manual grid controls will be shown hovering over the map while the alignment rulers will be shown in the scene.
The alignment tools in the scene are most useful when you wish to tweak a map to better fit a scene. This can happen if you’re not happy with your initial alignment from the Scene Importer or if you’ve just changed your mind after seeing the map with your other tokens.
Image Editor
When editing the default values of a map you will be able to align the grid. These changes will take effect for any future uses of the map but won’t adjust any previous uses (with one exception that we’ll cover down below).
The Image Editor is found when clicking the Edit button on a map tile in the Asset Manager.
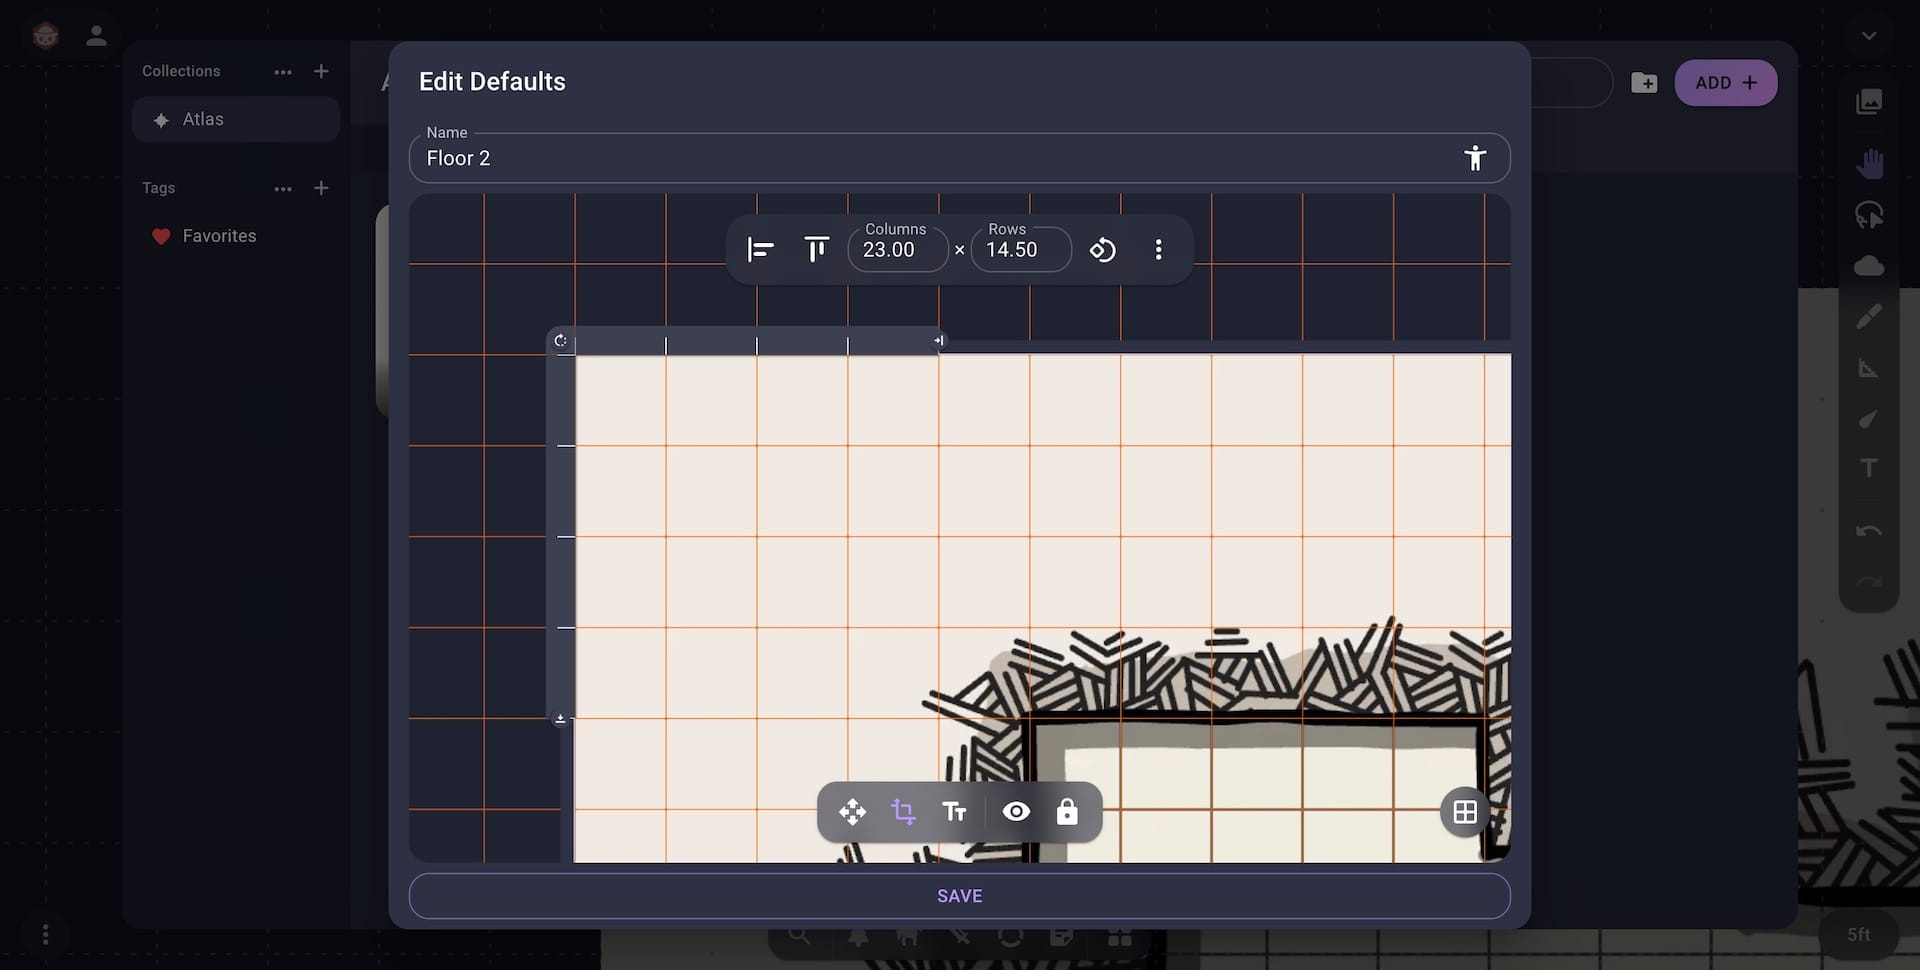
To access both the manual controls and alignment rulers select the Transform button in the bottom toolbar.
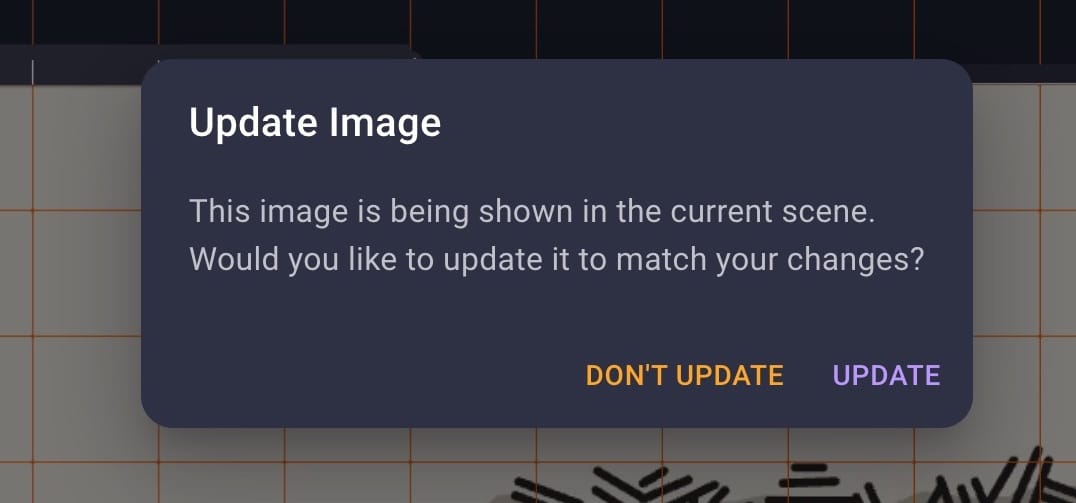
When you click Save all future uses of this map will use the new alignment values. If the current open scene includes the map that was just edited you will be prompted to update the map in that scene. If you select Update then the map inside that scene will be updated to match the new values.
The alignment tools in the Image Editor will be used less frequently. But they can come in handy if you wish to create a multi-map scene.
Manual Alignment (Known Grids)
The easiest way to align a map in Owlbear Rodeo is if you know the dimensions of your grid. This is often the case if you use a map making software or if you download your map from an online map creator.
To input your grid dimensions you can use the Manual Controls menu in Owlbear Rodeo.
This menu can be found in any of the locations mentioned above.
You can also include the grid dimensions in the name of the file you're importing. For example if you have a map with 49 columns and 28 rows including “49x28” in the filename will set up the grid for you.
Below is a list of popular places when you will know the dimensions of your maps grid:
Online Creators
Many online creators make maps that are a wonderful fit for use in Owlbear Rodeo.
For example here is the creator Cze and Peku which uses Patreon.
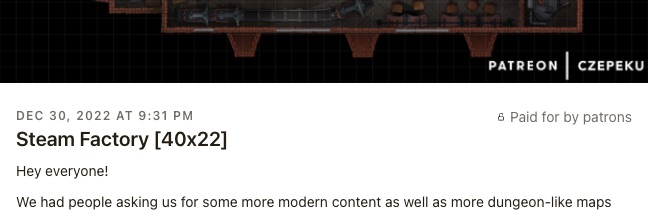
In this post you will see the numbers “40x22” these are the dimensions of the maps grid. Using these numbers in Owlbear Rodeo will perfectly align this map.
Dungeondraft
Dungeondraft is a piece of software you can use to create your own maps.
When creating a new map in Dungeondraft you will set the dimensions of the grid you wish to use.
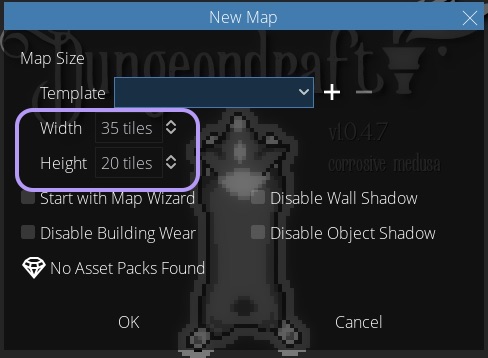
Using the width and height values as the columns and rows in Owlbear Rodeo will align your map.
Dungeon Scrawl
Dungeon Scrawl is an online tool for creating maps in a hand drawn style.
When exporting out of dungeon scrawl the grid dimensions will be included in the filename. Owlbear Rodeo will use these values to align the map when importing.
Visual Alignment (Unknown Grids)
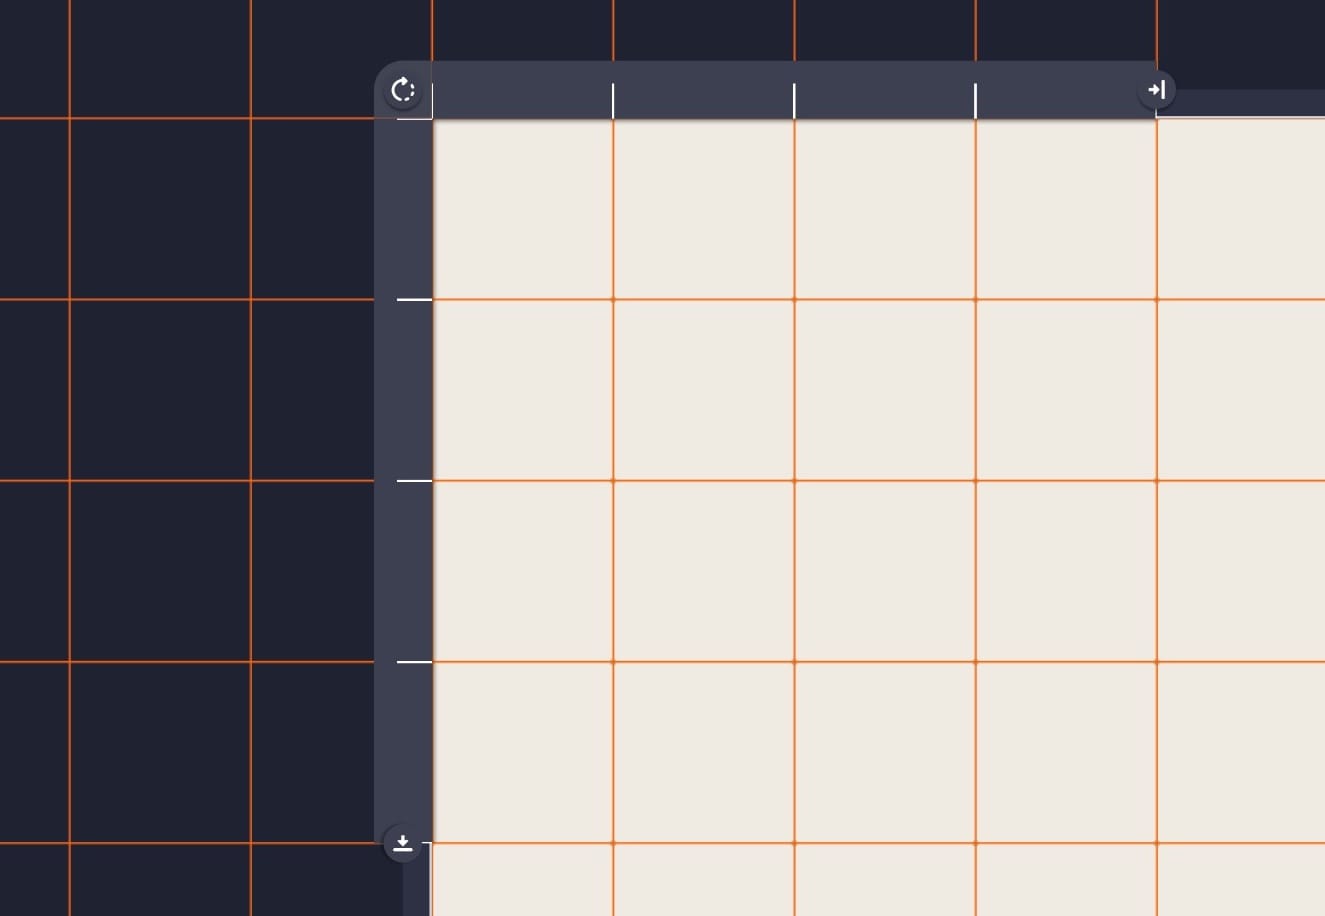
In some cases you may not know the dimension of your grid. For these cases the alignment rulers can be used. The alignment rulers are inspired by a physical drafting table and allow you to move and scale the map with precision.
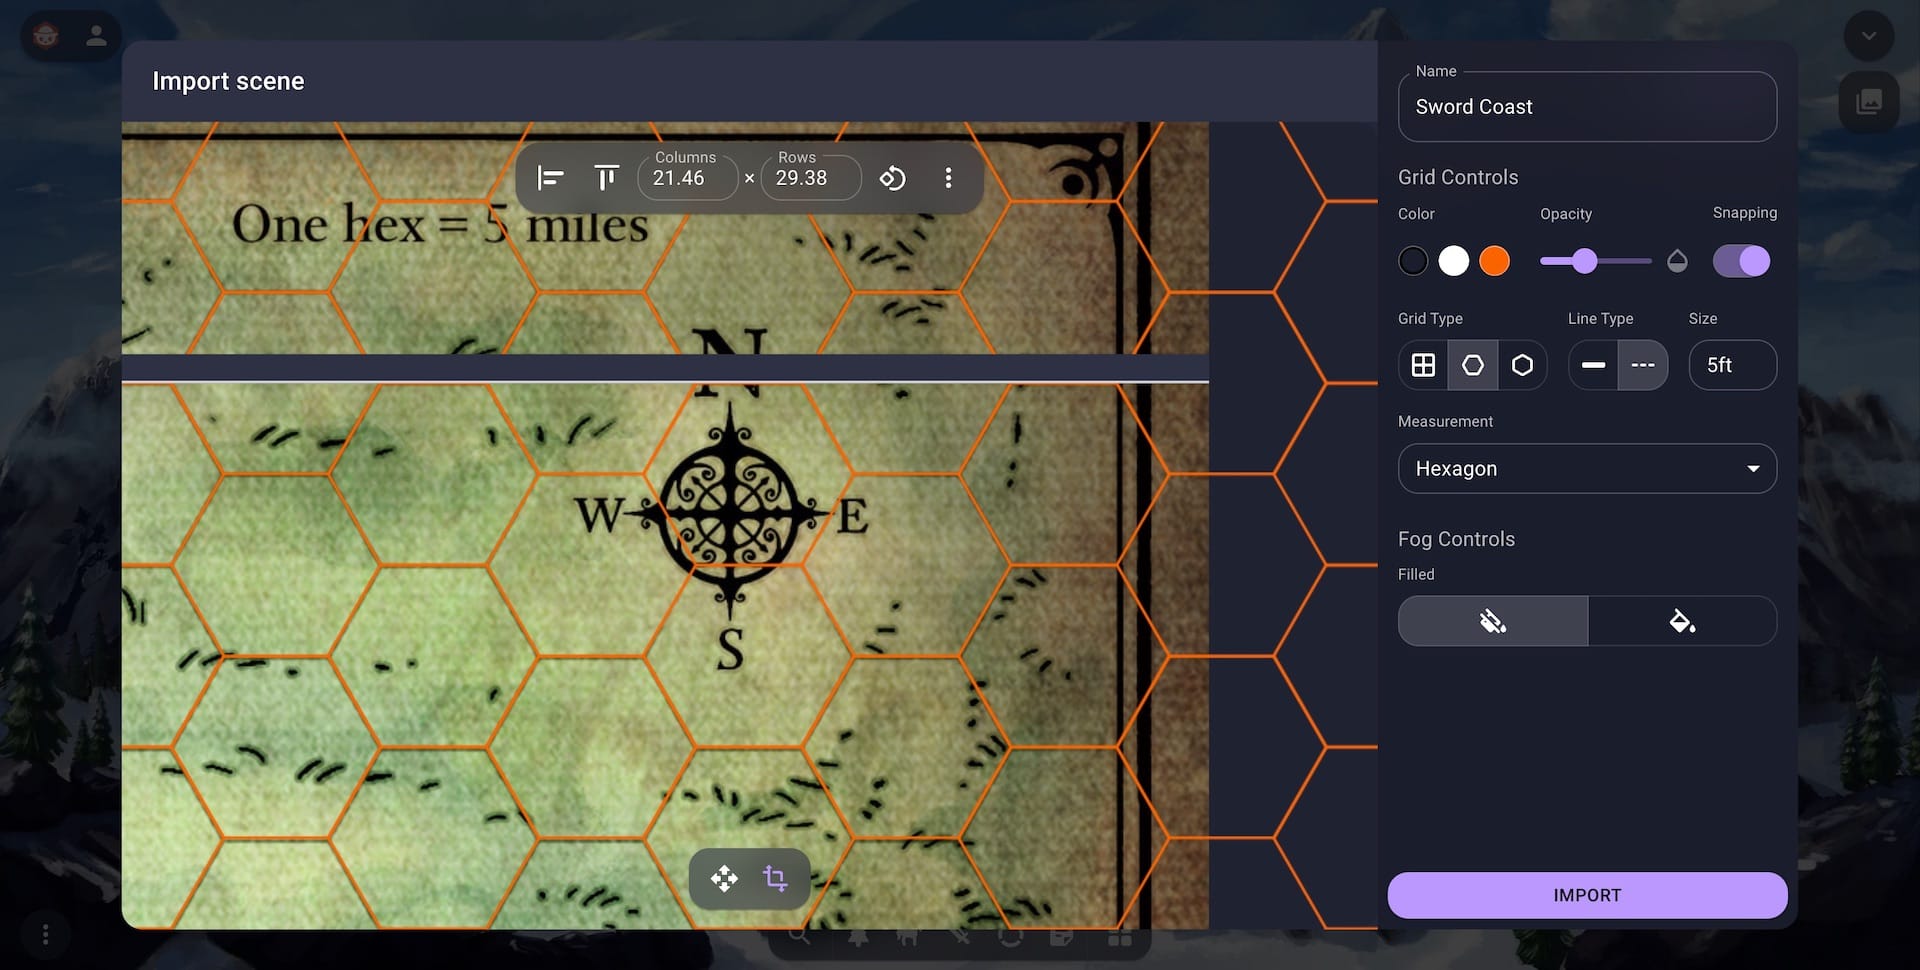
To demonstrate the alignment ruler we'll be using a map from Mike Schley. In the example below we’ll be using the Scene Importer but the same controls are available in all the places mentioned at the start of this guide.
Using the alignment rulers is a three step process:
- Align the corner of the ruler with a grid cell you can see on your map
- Roughly scale the ruler so that the four marks on the ruler align with the maps grid
- Use the precision rails to fine tune the alignment for a perfect match
Below each step of this process is detailed with a video to help.
Align the Corners
Drag the rulers so that the corner aligns with the top left of a grid cell in your map.
If you need more precision don’t be afraid to zoom in or you can hold down the Ctrl/Cmd key to slow the movement down.
Scale the Ruler
Use the size handles to get the scale of the map close to the grid.
If you’re happy with this alignment you can stop at this step (in fact many VTTs will only allow this level of alignment). However if you move the viewport to the very edge of the map you will notice that what seemed like a good alignment has slowly drifted as the error has accumulated with every grid cell.
You can see this below where the grid has drifted by tens of pixels at the corner of the map.
Refine the Alignment
To fix the drift accumulated at the edge of the map use the precision rail that extends to the end of the map.
For square grids you should now have a perfect alignment even across a very large map.
However if you are using a hexagonal grid you may still notice some drift in one axis. To fix this you will need to use the precision rails again on the drifting axis.
This is because the size of a hex grid doesn't neatly fit into the pixel values used in an image. This means that many of the hex grids you find online will have drift that accumulates as the grid gets bigger. This drift is baked into the image of the map itself so you will need to account for it.
To demonstrate the issue with hex grids we can try to align an overland travel map. This map is also from Mike Schley.
Below we can see that we have perfectly aligned the grid on the horizontal axis.
However if we change our view to the bottom of the image you will notice that the vertical axis is misaligned.
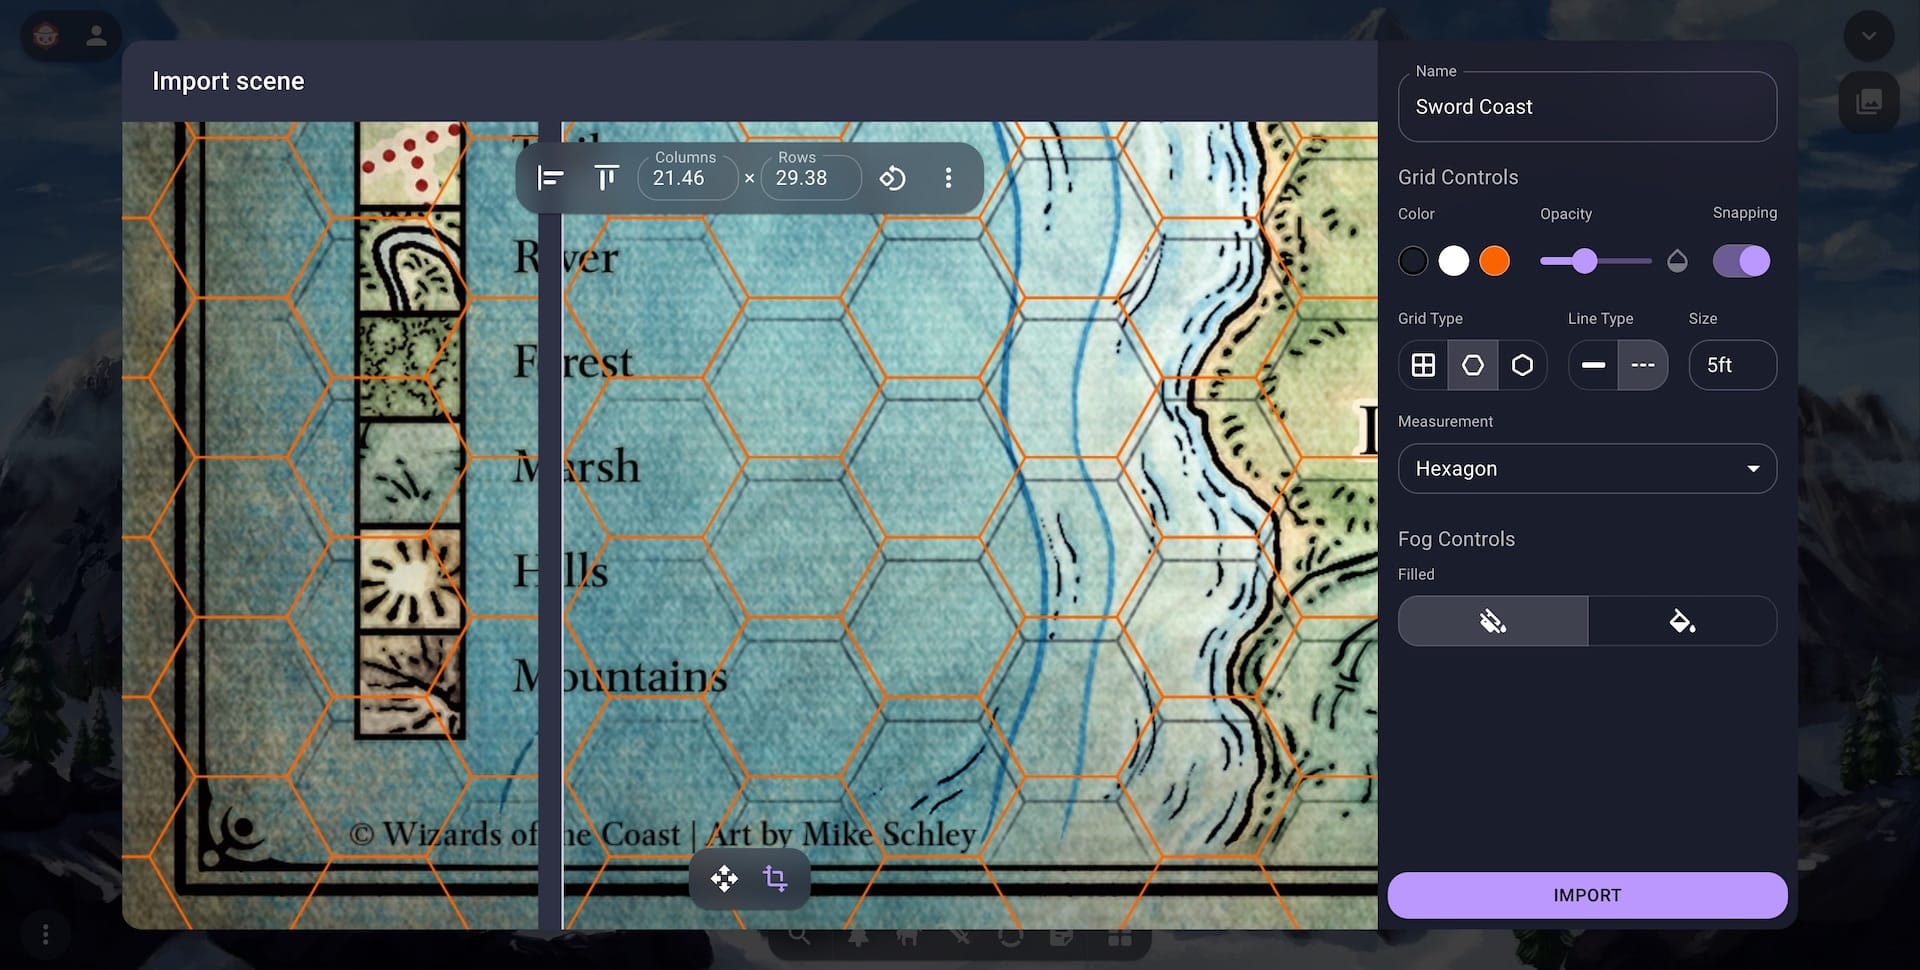
To fix this we can hold Shift as we align the vertical axis. This will prevent Owlbear Rodeo from adjusting both axis at the same time. Meaning our horizontal alignment will remain fixed and we'll only be adjusting the vertical.
The grid will now be aligned perfectly for the entire map.